Check out our widget portfolio and see what is possible with Feedwind
REGULAR SIDEBAR WIDGETS
YOUTUBE/VIDEO WIDGET
HORIZONTAL SCROLL/TICKERTAPE WIDGET
From April 26th 2017 we will no longer be allowing the creation of Feedwind V1 widgets. The new FeedWind V2 will be the only version available for you to obtain the code snippet. However, we will continue to support existing V1 users and their widgets will continue to function as before.
If you are still using V1, we will still be supporting your widgets for the foreseeable future. However, it will not be possible to create any new V1 widgets as the setup screen for V1 will no longer be available so there is no way to get V1 code after April 26th 2017. We do not currently have a fixed date for the full deprecation of V1 but it is not in the near future.
The good news is that V2 has all the existing features of V1 plus some great new features. These include support for horizontal scroll and a dashboard where you can save your widgets. We also now support source-specific feeds such as the recently introduced Facebook and Google Calendar widgets. To find out more about FeedWind V2 functionality, operation and feed source/platform support, please visit our V2 support pages.
We will continue to add new features and support for more sources/platforms. FeedWind V2 is already a leap ahead from V1. For these reasons we highly recommend you migrate to a V2 widget so you can take advantage of the new features and layouts.
It only takes a minute to sign up for V2 and requires just an email address. You can even preview V2 without a signup (although you will not be able to save any widgets or get the code).
If you have any questions about the deprecation of V1 setup, or any other suggestions/queries about FeedWind, please do not hesitate to contact us
We hope you continue to enjoy using FeedWind and look forward to seeing you create some V2 widgets!
Pro users
If you are a FeedWind Pro user, your widgets are free of branding (our logo+link) below the widget, leaving room for you to add your own logo. Including your own widget logo beneath (or anywhere around or overlaying) the widget is quite easy.
Free users
If you are a free user it is not possible to remove our branding & link below the widget, but you can still add your own logo almost anywhere in the widget container. Please note: You are not permitted to obscure our logo or disable the link to comply with our Terms and Conditions of Use. If you need to remove the Feedwind branding, you can upgrade to a Pro account.
As you probably know, web pages are constructed from page elements such as <div> which is a block element. To add a widget logo, you can place your widget in a container such as a <div>, then insert your logo as an <img> into the container in the appropriate position and using HTML/CSS to style it.
Note: Although a <table> element can be used to display a logo beneath a widget, this is not recommended as when resized, tables can sometimes flow into an adjacent column breaking the widget apart from the logo and are difficult to manage in a responsive environment.
This example uses a <div> with the logo image placed after the Feedwind code. The <div> has also been extended and filled with a background color to match the widget making the two elements (the widget & the logo) appear seamless. Here is the code used:
This example uses a <div> with the logo image placed at the top, above the FeedWind code snippet. The main feed title has been disabled in this example, but the title could remain if so desired.
In this example the title bar was enabled and a background image for the title bar was specified. The background image is mostly transparent with a logo placed to the right hand side. Transparency allows for the main title and title bar background color to be visible. If a non-transparent image is used, the title bar will be obscured.
There is no code other than the FeedWind code snippet. A URL for the logo will be required and entered into the FeedWind setup screen.
Here is the logo image used in the Main Title banner.

This is how the widget looks with the logo URL inserted into the setup screen, “Titles” section.
As with all our widgets, you can use CSS to create a custom Facebook widget and match any website design. The setup screen for our Facebook widget allows you to create a number of different styles, but we understand you may need your Facebook widget to match your site design more closely.
Here are the CSS classes and structure for you to create a custom Facebook widget:

Use your favorite text editor or software to prepare the CSS file. FeedWind is constructed with the following HTML code. Notepad++ is a great free editor that is ideal for creating a CSS file.
A basic file would look something like the example below, and produce the simple customization you see to the right. As you can see the CSS is split into three sections; the Container, Header and Content. We have commented these . You can simply copy this code into Notepad++ or your text editor and modify the contents, then save is as myfilename.css (or whatever name you want but it must have the .css extension).
Place the CSS file on your local server or use a service such as Dropbox to store your CSS file offsite. Copy the URL for use in the Feedwind setup screen.
Click on the >Advanced Settings link in the “General” section of the setup screen. Enter the URL of the custom CSS location in URL of Custom CSS box. The new design will be displayed in the Preview area.

Note: When using a custom CSS, some parts of the settings screen will be greyed out and disabled. This is to prevent conflicts between FeedWind’s default settings and settings in the custom CSS. The custom CSS is used, the .
FeedWind has the option to set the maximum length of the titles and content of feeds by specifying the number of characters to display. FeedWind automatically adjusts the number of feeds shown based on the value entered for the maximum length. Sometimes a feed item can display outside the container depending on the line-height and other settings in the custom CSS. In this case, please adjust the settings in the CSS file or adjust the number of characters allowed in the titles/content.
Here is an example custom RSS widget (see below for the CSS used):
/* This adds the ability to utilize Google WebFonts in your FeedWind widget */
@import url(http://fonts.googleapis.com/css?family=Noto+Sans);
/* This is the styling for main Facebook feed container – NOTE: the background-color affects the footer background.*/
#fw-container {
text-align: left;
padding: 10px;
font-family: ‘Noto Sans’, Helvetica, sans-serif;
box-sizing: border-box;
background-color:#4e82d0;
}
/* This is the styling for the header container*/
#header {
margin: 10px 20px 10px 20px;
color: #fff;
font-size: 18px;
background-color: #888;
background-image: url(“http://glassho.me/fwtest/bannertop.png”);
background-repeat: repeat-x;
}
/* This styles the feed item URL */
.fw-fb-feed-item-url {
text-decoration: none;
}
.fw-fb-feed-item {
display:block;
}
/* Styling for the Main Title in the header container*/
.fw-fb-feed-title {
margin: 10px 20px;
font-weight: bold;
word-wrap: break-word;
text-align: center;
text-shadow: 1px 1px 0 blue;
display:block;
}
.fw-fb-feed-header-title {
border:0 solid #000;
}
/* Styling for the Main Title link in the header container*/
.fw-fb-feed-title a:link {
color: #fef;
text-decoration: none;
}
/* Styling for a “visited” Main Feed Title link in the header container*/
.fw-fb-feed-title a:visited {
color: #ddd;
text-decoration: none;
}
/* This is the styling for a Main Title link on “mouseover” (also known as “hover”) in the header container*/
.fw-fb-feed-title a:hover {
color: #fff;
text-decoration: none;
}
/* This is the styling for an “active” Main Title link in the header container*/
.fw-fb-feed-title a:active {
color: #fff;
text-decoration: none;
}
/* This is the styling for the feed body (i.e all Feed Items) container. */
/* WARNING: be careful adding Left or Right Padding as you can lose the scrollbar
when the L/R padding is set to more than 8px; the scrollwheel on a mouse still works however,
but the scrollbar can disappear after 8px of padding either side. Use Margins instead add space around the content container.*/
/* This is the styling for the Feed Item content module – i.e. the body container */
.fw-fb-feed-item-content-module {
margin: 10px 10px 10px 0;
height: 170px;
padding: 10px;
border-bottom: 1px solid #7a86c4;
border-top: 1px #7a86c4 solid;
box-shadow: 0 1px 1px #222;
background-color: rgba(30, 30, 30, 0.6);
}
/* This is the styling for the Facebook Item Title in the body container*/
.fw-fb-feed-item-title {
display:block;
}
/* This is the styling for an “unvisited/unclicked” Facebook Item Title link in the body container*/
.fw-fb-feed-item-title a:link {
margin: 20px 0 10px 0!important;
color: #00aeff;
text-decoration: none;
font-size: 16px;
}
/* This is the styling for a “visited/clicked” Facebook Item Title link in the body container*/
.fw-fb-feed-item-title a:visited {
color: #39f;
padding: 20px 0 0 0;
text-decoration: none;
}
/* This is the styling for a Feed Item Title link on “mouseover” (also known as “hover”) in the body container*/
.fw-fb-feed-item-title a:hover {
color: #39c;
text-decoration: none;
padding: 20px 0 0 0;
}
/* This is the styling for an active Facebook Item Item Title link in the body container*/
.fw-fb-feed-item-title a:active {
color: #09f;
text-decoration: none;
padding: 20px 0 0 0;
}
/* This is the styling affecting a Feed Item Description, Thumbnail or Video Player link for a feed item in the body container*/
.fw-fb-feed-item-link {
margin: 0 0 0 3px;
padding: 0 2px 0 3px;
color: red;
text-decoration:none;
}
/* This is the styling affecting an “unvisited/unclicked” Feed Item anchor for a feed item in the body container*/
.fw-fb-feed-item-link a
{color: #123456;
text-decoration: none;
}
/* This is the styling affecting an “unvisited/unclicked” Feed Item Link anchor for a feed item in the body container*/
.fw-fb-feed-item-link a:link {
color: #fff;
text-decoration: none;
}
/* This is the styling affecting an “visited/clicked” Feed Item Link anchor for a feed item in the body container*/
.fw-fb-feed-item-link a:visited {
color: #fff;
text-decoration: none;
}
/* This is the styling for a Feed Item Title Link Anchor on “mouseover” (also known as “hover”) for a feed item in the body container*/
.fw-fb-feed-item-link a:hover {
color: #fff;
text-decoration: none;
}
/* This is the styling affecting an “active” Feed Item Link anchor for a feed item in the body container*/
.fw-fb-feed-item-link a:active {color: #666666;
text-decoration: none;
}
/* This is the styling for the Description in a Feed Item (i.e. the text of a Feed Item in Thumbnail mode, or text+images in Full HTML mode)*/
.fw-fb-feed-item-description {
font-size: 12px;
text-align: left;
margin: 10px 0 0 0;
color: #fff;
font-weight: 300;
word-wrap: break-word;
text-decoration:none;
display:block; }
/* This is the styling affecting a Feed Item Date for a feed item in the body container*/
.fw-fb-feed-item-date {
display:block;
margin: 0 20px 0 3px;
padding: 0 2px 0 3px;
color: #999;
font-size: 10px;
text-align: right;
}
/* This is the styling for a Feed Item thumbnail. Note: currently image dimensions (height: and width:) are not supported */
.fw-fb-feed-item-image {
border-top:1px solid #7a86c4;
padding-right:10px;
}
/* adjust the Facebook thumbnail container – NOTE: you cannot adjust the image size/dimensions here */
.fw-fb-feed-item-image-module {
margin: 10px 0 0 10px;
}
Note: It is not possible to use every CSS command in a FeedWind custom CSS. For example, -repeat commands for wrapper images in the header are not supported. We cannot cover every eventuality as there are so many potentially available CSS operators and parameter combinations.
Usually, the easiest way to find out if your CSS works with FeedWind is by adding a new item into the CSS and refreshing your web page to see how it appears.
Create a FeedWind Facebook widget today and share your posts on any website!
It’s easy to host css on Dropbox. This enables you to store a .css file for a custom Feedwind widget without having to host CSS on your own server. This is particularly useful where you are using an online platform such as Wix or Weebly to build your site; platforms like these do not have the facility to host CSS files, so Dropbox is a great solution.
First you need to create your custom CSS file. Depending on what sort of widget you a building (RSS widget, Facebook page widget or Google Calendar widget). You can use any code editor or plain text editor to create your CSS as explained in the relevant support documents.
Once you have created your stylesheet and saved it as a .css file, you can then upload it to Dropbox for later use.
On an Apple Mac, Open your dropbox, and locate your .css file. Right-click on the file and select “Copy Public Link.” This will copy the publicly available URL for your .css file to your clipboard.

In a windows browser, Dropbox display things a little differently from the Apple Mac version or the Dropbox app. Below are example screenshots of

https://www.dropbox.com/s/j0vdhe8owoolgh5/custom98.css?dl=0
IMPORTANT: To use this URL in FeedWind you will need to make a small adjustment to the URL by changing the ‘www.‘ in the URL to ‘dl.‘
e.g. https://www.dropbox.com/../ becomes https://dl.dropbox.com/../
When you have your new URL e.g.
https://dl.dropbox.com/s/j0vdhe8owoolgh5/custom98.css?dl=0
You can then use this .css URL in your RSS, Google Calendar or Facebook page widget setup screens and create a custom styled widget.
Some users who have previously created v1 widgets and have migrated to v2 might like to retain the default appearance of the FeedWind v1 style widget. The setup screen for v1 has now been removed so we now only provide v2 setup for our widgets.
To recreate the v1 style in v2, you must use a custom CSS. Here is an example custom CSS for the FeedWind v1 style for you to copy to your own .css file and store on your server (or store on Dropbox). When you use this CSS, you may still wish to control widget settings from the v2 setup screen – for example, font sizes are easy to set and can be instantly previewed in the setup screen as opposed to controlling them through CSS.
/*Start CSS: FeedWind-v1-style */
body{margin:20px;padding:0;overflow-x:hidden;}
img{border:none;}
a{text-decoration: none;}
#fw-container{text-align:left;overflow:hidden;margin:0;padding:0;width:auto;font-family:Arial, Helvetica, sans-serif;font-size:12px;}
header{margin:0;padding:5px;color:#FFFFFF;background-color:#0066FF;background-image:none;}
header .fw-feed-title {margin:0;padding:0;font-weight:bold;border-bottom: none; word-wrap:break-word;}
header .fw-feed-title a:link{color:#FFFFFF;text-decoration:none;}
header .fw-feed-title a:hover{color:#FFFFFF;text-decoration:underline;}
header .fw-feed-title a:hover{color:#FFFFFF;text-decoration:underline;}
header .fw-feed-title a:visited{color:#FFFFFF;text-decoration:none;}
header .fw-feed-title a:active{color:#FFFFFF;text-decoration:none;}
#fw-feed-items{overflow:hidden;margin:0 0 0 0;padding:5px 0px 0px 0px;background-color:#FFFFFF;background-image:none;}
#fw-feed-items .fw-feed-item{margin:0 0 7px 0;padding:0 0 7px 0;border-bottom:1px dashed #CCCCCC;clear:both;}
#fw-feed-items .fw-feed-item-url{display: block;overflow: hidden;}
#fw-feed-items .fw-feed-item-content-module{margin:0 0 0 3px;padding:0;}
#fw-feed-items .fw-feed-item-title{margin:0;padding:0;color:#0066FF;font-weight:bold;}
#fw-feed-items .fw-feed-item-image{width:110px; height:100px; float:left; margin:5px 8px 5px 5px; overflow:hidden;}
#fw-feed-items .fw-feed-item-description{margin:0;padding:0;color:#666666;line-height:135%;word-wrap:break-word;clear:both;}
#fw-feed-items .fw-feed-item-date{margin:3px 0;padding:3px 0;color:#666666;overflow:hidden;text-overflow:ellipsis;clear:both;}
/* End CSS */
The resulting widget should look something like this:
If you need any assistance in creating the FeedWind v1 style in the v2 setup screen, please contact support and we will help you.
FeedWind subscriptions are managed by an automated system with a dashboard to allow you to manage your subscription details and print invoices.
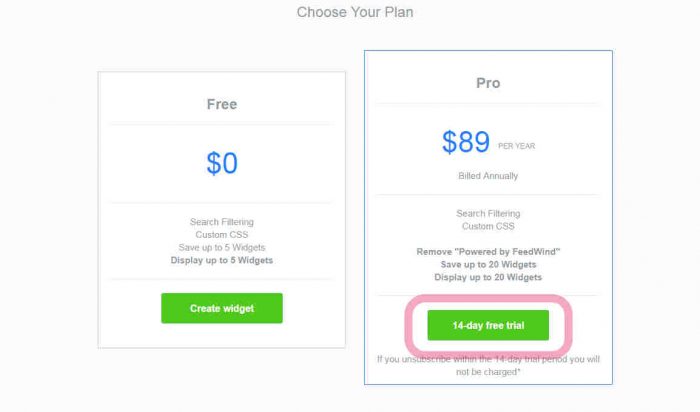
Currently we only offer one FeedWind subscription which is the Annual Pro Plan, priced at $XX per year and payable in advance.
For those who need more options, you’ll be pleased to hear we will be introducing Monthly and Enterprise plans soon.
On subscription, your account will automatically be activated as a Pro Plan. When your subscription is due for renewal, your subscription will automatically be renewed and you will be billed accordingly on the renewal date.
We offer a free FeedWind Pro 14-day Trial Plan so you can try out FeedWind Pro before deciding whether to make a subscription. You will be required to enter payment information which we will hold securely on file until the 14 days is over. If you choose to go ahead with a full subscription, we will charge the annual fee of $XX at the end of the trial period.
We will send a reminder to ensure you get the chance to choose whether or not to continue your FeedWind subscription. If you do decide to unsubscribe for whatever reason, we will erase your payment details and revert your account back to the Free plan (or remove it if you prefer).
Click on the “Try it free” plan button from the Pro plan/Upgrades page.
You will then be presented with the payment processing screens. Acceptable forms of payment are by credit or debit card.

After payment has been made successfully, you will have access to the account management dashboard in your account.
When you upgrade to a FeedWind subscription, you will have access to a dashboard which gives you the tools you need to manage your account. You can change payment details, print invoices and cancel your renewal. To access the dashboard, click on the Gear icon and select “Subscription” from the drop-down menu.


You can Change your payment information by clicking on the “Change credit card” link, in the Your Plan tab.
You can also view your next renewal date in the Your Plan tab.
If you choose to cancel your subscription renewal, then choose the “Cancel renewal” option in the Your Plan tab. If you cancel your renewal, your account will automatically revert back to the Free plan after the renewal date. You will then only have access to the oldest 5 widgets you created. We will not delete other widgets you have created in case you were unable to renew for some reason, but wished to do so. In this instance, if you make a subscription renewal we can reinstate widgets that you had created.
Note: We will only maintain your widgets in our archive for 30 days. If a renewal is not made within 30 days, we will delete those widgets above the oldest 5 allowed in a Free Plan. Any renewal during this 30 day period will be backdated to the original renewal date.
In the Billing History tab you can see all your billing details such as renewal dates, amounts paid and the invoice reference number.

You can also make use of the “Print” button alongside each billing entry to print an invoice for your FeedWind subscriptions.
If you need any assistance with your payment or the account dashboard, please contact support.
Drupal RSS can be used to create a Feedwind widget for any page/post/sidebar etc. so you can display a Drupal website feed on any website. You can also display an article feed from your Drupal site, on another page on your Drupal site. For example you could display your articles in a feed widget on your homepage as a blog/article summary.
As with most CMS platforms, Drupal has a dual editor for articles and pages which allows you to edit in fully formatted mode, or edit in HTML mode.
Important: To paste the FeedWind code snippet into a page or article, you must first use the button to select the <> Source editor and not use the default formatting editor. In addition, you must also enable “Full HTML” in the Text Format option just below the editor.
You must use the source code editor because if you paste the Feedwind code in the formatting editor you will simply see that code when you look at your page/article. If you do not select the “Full HTML” option, when you save your page/article, the JavaScript will be stripped (parsed) out and your widget will not display.

After pasting your FeedWind code, save/publish your article or page. Your new widget should then be visible in the Preview or when you view your page. Here is an example of a FeedWind widget on a Drupal site.

Here is an example of a Drupal RSS feed URL:
http://www.example.com/rss.xml
Drupal provides an RSS feed of all posts (articles) automatically. The default is to display only 10 posts.
You can adjust settings for Drupal RSS at:
http://example.com/admin/config/services/rss-publishing
(note: change example.com to your domain name)
You can also find the settings in the menu at Admin >Configuration>Web services > RSS publishing
There you can include a feed description, adjust the number of items in your feed(s) and select from three types of feed content:

In addition, Drupal RSS feeds can be configured in detail so you can customize your feeds before you create your FeedWind widget.
There are many settings which can be adjusted at: https://example.com/admin/structure/views/view/frontpage/edit/feed_1
In the Admin menu: Structure >Views > Frontpage entry [Edit]

If you require any assistance with FeedWind or how to implement a FeedWind widget in Drupal, please contact support and we’ll help you get things working.
To reposition the thumbnail images in your feed, you will need to use a custom CSS to style your widget. Specifically, within your .css file you need to create parameters for the class:
.fw-image
Using “margin:” parameters you can reposition the thumbnail in the feed container. You may also need to adjust the classes:
.fw-feed-item-description
.fw-feed-item-title
These adjustments may be required in order to ensure that your image elements do not overlap/obstruct the Feed Item Title and the Feed Item Description elements.
Learn how to create a custom CSS for your FeedWind widget
Your RSS feeds are all coded in XML. Usually this is an automatic process whereby a CMS builds RSS feeds automatically. Some webmasters might prefer to build their own feeds by writing the XML manually or using an external feed generator. Whichever way your feeds are created, if the source content provides images, FeedWind is able to display them either as thumbnails or part of a ‘Full HTML’ style widget.
Where there are multiple images available in a single feed item, deciding which thumbnail to choose can be a challenge. It might seem obvious to choose the first image in a feed, however, this can often be a logo or icon which is not suitable as a thumbnail as it may be repeated down the page. In addition, some images are too small to represent as as thumbnail without an unpleasant grainy look as we would need to magnify to fit the image inside the thumbnail frame. Other unsuitable images include decorative images, such as a horizontal line or banner stripe.
So some images dimensions which also do not convert well to the ratios for thumbnail images which are ideally rectangular 6:4 or 7:5 ratios or square.
For this reason, over the years we have been developing FeedWind, we have defined specific logic steps which our parsing program uses when identifying the correct image for a thumbnail.
In the setup screen there are three options for the selection of thumbnail images. Auto, media_content, media_thumbnail, enclosure

With “Auto” selected as the Image source in the FeedWind setup screen, the following image selection logic is applied.
With “media_content“, “media_thumbnail” or “enclosure” selected as the Image source in the FeedWind setup screen, the following image selection logic is applied.
*If an image is not found, display the largest image.
Your RSS feeds are all coded in XML which contains <tags> for different feed components, such as a Description, Title etc. These tags can contain images in your feed; there are four tags which we use to derive thumbnail images. In the dropdown menu of the FeedWind setup screen there are four options for the selection of thumbnail images for your FeedWind widget:

Where there are multiple images available in a single feed item, deciding which thumbnail to choose can be a challenge. It might seem obvious to choose the first image in a feed, however, this can often be a logo or icon which is not suitable as a thumbnail as it may be repeated down the page. In addition, some images are too small to represent as as thumbnail without an unpleasant grainy look as we would need to magnify the image to make it fit inside the thumbnail frame. Other unsuitable images include decorative images, such as a horizontal line or banner stripe.
The ideal size ratios for thumbnail images are a rectangular 6:4 or 7:5 ratio, or square.
For this reason, over the years we have been developing FeedWind, we have defined specific logic steps which our parsing program uses when identifying the correct image for a thumbnail.
With “Auto” selected as the Image source in the FeedWind setup screen, the following image selection logic is applied.
With “media_content“, “media_thumbnail” or “enclosure” selected as the Image source in the FeedWind setup screen, the following image selection logic is applied.
*If an image is not found, display the largest image.
If you need help with images in your widgets – or anything else to do with Feedwind – please contact us.
No – You cannot include FeedWind (which is JavaScript-based) in an email
FeedWind widgets are coded in JavaScript (.js) and for security reasons, .js cannot be included in an email. This is a security issue known as “cross-site scripting.” Although adding a .js snippet to your emails might seem a useful thing to be able to do – particularly when for software such as FeedWind – JavaScript allows a programmer considerable scope when it comes to executing program code which could potentially be malicious. You can be sure however, that FeedWind would never create or publish code that would harm our users, or their users!
In general however, including .js in an email could be a big risk for recipients because a JavaScript program could contain or trigger a virus, malware or other unwanted code and there is no way at present for an email program to figure out whether a specific snippet of .js is good or bad. Even though an email client could be forced to ignore this, it would be a bad decision to do so.
When an email downloads to your computer, the email client (Outlook/Gmail, Yahoo mail etc.) would have to execute the .js to know what the code actually does. This is not a feasible situation as to determine whether malware/malicious code is present, the code would have to be run independently of your operating system and scanned to ensure a virus or malware is activated.
It would be like “closing the stable door after the horse has bolted” By the time the issue is detected, the harm could already be done as code can auto-execute when an email is opened. This is not like detecting spam in an email; this is preventing a program from executing upon mail-open. JavaScript is not the only coding method that presents this problem and many scripting languages are prohibited from embedding in an email.
If you want to share a FeedWind widget using email there is a way.
When you “Save & Get code” in FeedWind, the code snippet contains a URL for your widget. The whole code snippet will look something like this:
<iframe src=”https://feed.mikle.com/widget/v2/33777/”></iframe>
Within is a URL you can use in an email to share your widgets with your email recipients
e.g https://feed.mikle.com/widget/v2/33777/
We recently introduced a new automated payment system to upgrade from our existing manual system for FeedWind Pro subscribers. Previously we accepted PayPal subscribers. However, our new payment system does not accept PayPal payments, so for those existing users who are due for renewal we will require payment for the renewal by credit or debit card.
We understand that this change in payment options might be an inconvenience for PayPal subscribers so for those users we are offering a discount of $39 when you renew using a credit/debit payment in the new automated system. If you renew without taking up this offer, the annual fee would be $89.
All you have to do is visit our payments page and enter you payment details (credit/debit card). We will not charge your card immediately. We will only charge the card ON THE RENEWAL/EXPIRY DATE. To compensate you for the inconvenience we will apply the $39 discount at that time. If you decide to cancel before your renewal is due then just let us know and we will prevent any further charges from being made.
 Even though it appears we are charging your debit/credit card in this process, we detect the email used in the following modal and we will not charge until your renewal date and then it will be only at the discounted rate of $50. Please make sure you use the same email that your Pro subscription was made when you fill out the payment modal.
If you have any questions about this process, how the discount/payment is applied, or anything to do with FeedWind, then please do not hesitate to contact us.
The Facebook widget ‘s display issue has been resolved around 8 am (PT), 11 am (ET) March 18, 2020.
We apologize for any inconvenience this may have caused.
【reference】
◎ Change of authentication method of Facebook widgets
◎ How do I manage roles for my Facebook Page? (external link)
Users can now show multiple posts in a single feed using the card view. Previously, users were only able to show one post per feed item in card view. The effect simulates a type of slideshow, allowing greater control over the image visuals for any type of feed. The following document explains how to use this feature in a step-by-step format.
RSS
https://feed.mikle.com/blog/feed/
Responsive
Card
3
1
Rest keep as default
The multi-post card feature allows for more control over your feed’s look and feel. Most web designers will find it useful as a way to add an image gallery to a page. Try disabling Title and Content in the Feed Content section to see a collage of chosen images. We have provided an example of an image gallery made using FeedWind to help you get started here.
Users can now show any RSS feeds in a new style with overlay text and faded background effect view using custom CSS. Previously, users were only able to show images below the text or sidewise as a thumbnail.
RSS
https://www.wired.com/feed/category/ideas/latest/rss
Responsive
Thumbnail
1
ON
Horizontal
ON
ON
ON
Note: Copy CSS from below, paste into your CSS file [your-file-name.css] , make changes as per your need and upload to your server or in Dropbox [ Check How to host CSS on Dropbox Click here], copy the complete CSS path [e.g. http//example.com/css/your-file.css] and paste in "Custom CSS Link" field in Feedwind setting.

/* Copy CSS From Here  */

#fw-feed-items .fw-feed-item-url[onclick] {
    position: relative;
}
.fw-feed-item,.fw-feed-item:hover {
    margin: 0;
    padding: 0;
    clear: both;
    border-bottom: 0px dashed #CCCCCC;
}
#fw-container{
	height: 350px;
}
.fw-feed-item-content-module {
    margin: 0px;
    padding: 10px;
    overflow: hidden;
    position: absolute;
    top: 0;
    height: 100%;
    background: rgb(255,255,255);
    background: linear-gradient(273deg, rgba(255,255,255,0) 0%, rgba(0,0,0,0.5130427170868348) 0, rgba(0,0,0,1) 100%);
    width: 100%;
	padding-top: 75px;
}
.fw-feed-item-image {
    margin: 0;
    padding: 0;
    width: 100%;
    height: 350px;
    overflow: hidden;
}
span.fw-feed-item-title {
    padding: 10px 0;
}
.fw-feed-item-image-module {
    margin: 0 0 0 5px;
    padding: 0;
     float: none;
}

.fw-feed-item-title,
.fw-feed-item-description,
.fw-feed-item-date {

    width: 50%;

}
/*   CSS Ends Here  */
OFF
20
OFF
16
#0084FF
#A8A8A8
#000000
OFF
Rest keep as default
The time ranges for your calendar are established in the Date and Hour Range section. This feature allows you to target specific events over specific time periods, in the past or the future. The following are the options presented in the FeedWind setup screen in the ‘Calendar Event’ section, from top to bottom:

In the example calendar, there is a short listing of upcoming holidays. The provided range of 0 to 90 will show all holidays listed in the calendar over the next 90 days, as shown by the 0 in the ‘From’ box and 90 in the ‘To’ box. Also, note that the ‘Date’ button is active rather than the ‘Hour’ button, so the example shows dates instead of times.
Users can display start and end times and dates in their Google Calendar Widgets using fixed values, allowing dynamic changes to the calendar feeds, like the ones generated by Google Calendar. For example, you can extend a calendar widget about your favorite baseball team to cover their schedule by extending the range to match the start and end times of the regular season, or you can show all events in a month by altering a few values instead of manually entering calendar dates.

These instructions relate to the Date section on the left side of the widget creation screen, as seen in the image above:
The setup screen and preview is provided for you to experiment with these values and buttons, observe the changes, and adjust them until the results are satisfactory.
We’ve provided an example calendar on this page where you can experiment with the values of a calendar and observe the changes. The link contains a company calendar with the type of events you will see at an organization, to give you an idea of how this feature can be used for business.

FeedWind’s preloaded text feature allows you to edit the text that appears when a feed is loading. The feed displays the text ‘Loading’ by default, but users can change this to text that is more specific. For example, a calendar that displays upcoming shows can display “loading upcoming shows” instead of the generic text to inform the user; a work feed can insert important reminders instead of a loading message in a feed read by employees.


