Quantcast
Channel: FeedWind Support

Top Trending RSS Feeds in 2023

$
0
0

As we move into the digital age, RSS feeds have become an increasingly popular way for people to stay up-to-date with the latest news and information from their favorite sources. In 2023, there will be several RSS feeds that are trending and worth following. In this blog, we’ll take a look at some of the top trending RSS feeds in 2023 and explain why using Feedwind to create custom RSS feed widgets is worth considering.

techcrunch-logo

TechCrunch – TechCrunch is a leading technology news site that covers startups, gadgets, and social media.
Its RSS feed URL is: https://feeds.feedburner.com/TechCrunch/

Mashable – Mashable is a popular media company that covers a wide range of topics, including technology, entertainment, and culture.
Its RSS feed URL is: https://in.mashable.com/

mashable-logo

Wired – Wired is a popular technology and science magazine that covers a wide range of topics, including gadgets, gaming, and security.
Its RSS feed URL is: https://www.wired.com/feed/rss

The Verge – The Verge is a popular technology news and media company that covers a range of topics, including gadgets, culture, and science.
Its RSS feed URL is: https://www.theverge.com/rss/index.xml

CNN – CNN is a global news organization that covers a wide range of topics, including politics, business, and technology.
Its RSS feed URL is: rss.cnn.com/rss/edition.rss

Forbes – Forbes is a leading business news site that covers a wide range of topics, including entrepreneurship, finance, and technology.
Its RSS feed URL is: https://www.forbes.com/business/

ESPN – Is a leading sports media company that covers a wide range of sports, including football, basketball, baseball, and more.
Its RSS feed URL is: https://www.espn.com/espn/rss/news

Buzzfeed – Buzzfeed is a popular media company that covers a wide range of topics, including news, entertainment, and culture.
Its RSS feed URL is: https://www.buzzfeed.com/index.xml

Harvard Business Review – Is a leading management magazine that covers a wide range of topics, including leadership, strategy, and innovation.
Its RSS feed URL is: http://feeds.hbr.org/harvardbusiness

National Geographic – National Geographic is a leading media company that covers various topics, including science, nature, and culture.
Its RSS feed URL is: https://www.natgeomaps.com/rss

In conclusion, staying informed and up-to-date with the latest news and developments is essential in today’s fast-paced world. These top 10 trending RSS feeds in 2023 are excellent sources for staying informed about the latest trends and happenings in various fields. And using Feedwind to create custom RSS feed widgets, you can conveniently display the latest updates from these feeds on your website or blog, making it easier for your audience to stay informed as well.


Twitter Widget is Now Available

$
0
0

Thank you for your patience during the temporary outage of the Twitter widgets. We are thrilled to announce that the Twitter widgets have been restored. As of May 14, 10 pm (PDT), May 15, 1 am (EDT), and May 15, 5 am (GMT), you can now enjoy the benefits of our customizable Twitter widget on your website.

Due to limitations on the new Twitter API, we have made a few adjustments to ensure a seamless user experience. Please take note of the following changes:

1. Only for Pro and Plus: The Twitter widget is exclusively available for the Pro and Plus plans. Unfortunately, we are no longer able to offer it as part of the Basic Plan.

2. Tweet Limit: Regardless of the plan you are subscribed to, each widget can display up to 15 Tweets. This limit strikes a balance between showcasing a variety of content and maintaining optimal performance.

3. Tweet Updates: We now refresh the tweets displayed on your Twitter widget every 24 hours. This change applies to both Pro and Plus plans.

4. Tweet Timeframe: The tweets shown in the widget are limited to those posted within the past seven days

If you’re having trouble with the Twitter widget on your website, here’s what you can do to fix it:

  1. Create a new Twitter widget.
  2. Copy the code of the new widget.
  3. Replace the old code on your website with the new code.

We understand that these modifications may impact your previous usage patterns, and we sincerely apologize for any inconvenience caused. 

If you have any questions or require further clarification, please don’t hesitate to reach out to our support team. We are here to assist you every step of the way.

Thank you for choosing FeedWind. We appreciate your continued support and look forward to enhancing your website with our feature-rich widgets.

The FeedWind Team

Start Your Own Podcast: A Beginner’s Guide

$
0
0

Starting your own podcast can seem difficult, but it’s easier than you think. In this beginner’s guide, we’ll cover everything you need to know to get started. From choosing your niche to building an audience, we’ve got you covered.

Start your own podcast beginners guide images

Choosing Your Niche

The first step in starting a podcast is to choose your niche. You need to decide what you want to talk about and who your audience is. What do you think people will be interested in hearing? Look for gaps in the market and consider how your podcast can fill those gaps.

Once you’ve chosen your niche, research the market to see if there is already a podcast covering your chosen topic. If there is, don’t be discouraged. Instead, think about how you can differentiate yourself and offer something unique to your listeners.

Equipment essentials: What you need to get started and how to set it up

Once you’ve chosen your niche, it’s time to get your equipment. The good news is that you don’t need expensive equipment to get started. A good-quality microphone and headphones will suffice. You’ll also need audio editing software and a recording platform. We recommend Audacity for editing and Zencastr for recording. Once you have your equipment, it’s time to set it up. Make sure your microphone and headphones are connected to your computer, and test your audio levels to ensure you’re recording at the right volume.

Understanding audio quality: Tips for recording clear, high-quality audio

Clear and high-quality audio is essential for any podcast. No matter how interesting your content is, if your audio quality is poor, your listeners will quickly lose interest. To ensure your audio quality is top-notch, make sure you record in a quiet room with good acoustics. Speak clearly and avoid any background noise. Test your audio levels before recording and adjust as necessary.

Planning your episodes: How to structure your podcast and create engaging content

Planning your episodes is crucial to the success of your podcast. 

  • Create an Outline: Write a script or outline to help you stay on track and ensure you cover all the important points.
  • Engage Your Audience: Ask your listeners for feedback and encourage them to submit questions or comments.
  • Keep it Consistent: Stick to a consistent schedule and format for your podcast. This will help you build an audience and keep them engaged.

Hosting and Distribution

Once you’ve recorded your podcast, you’ll need to host it and distribute it to major directories like Apple Podcasts, Spotify, and Google Podcasts. Here’s how to do it:

  • Choose a Hosting Platform: There are many hosting platforms to choose from, including Buzzsprout, Libsyn, and Podbean. Choose one that suits your needs and budget.
  • Submit to Directories: Submit your podcast to major directories like Apple Podcasts, Spotify, and Google Podcasts. You’ll need an RSS feed, which your hosting platform will provide.
  • Create Feedwind Podcast Widget: Add a podcast widget to your website or blog using FeedWind. This will allow your listeners to easily access and listen to your podcast episodes. You can customize the widget to display your most popular or featured episodes. This can help new listeners discover your best content and encourage them to explore your podcast further.

Building an Audience: Tips for promoting your podcast and growing your listener base

Building an audience takes time and effort, but there are some tips you can follow to promote your podcast and grow your listener base:

  • Social media: Use social media platforms such as Twitter, Facebook, and Instagram to promote your podcast and engage with your audience.
  • Collaborate with other podcasters: Reach out to other podcasters in your niche and collaborate on episodes or cross-promote each other’s podcasts.
  • Attend events: Attend events and conferences related to your niche and promote your podcast to attendees.
  • Ask for reviews: Encourage your listeners to leave reviews and ratings on major directories such as Apple Podcasts.
  • Offer exclusive content: Offer exclusive content such as bonus episodes or behind-the-scenes content to incentivize listeners to subscribe and engage with your podcast.

By following these tips and strategies, you can successfully promote your podcast and grow your listener base over time.

Starting your own podcast can seem difficult at first, but with the right equipment, planning, and promotion strategies, anyone can create a successful podcast. Use this beginner’s guide as a starting point and keep experimenting and refining your approach as you go. Happy recording!

Pinterest Widget Best Practices: Tips for Optimizing Your Widget for Maximum Engagement

$
0
0

Pinterest is a powerful platform for showcasing visual content and driving engagement. By integrating a Pinterest widget into your website using Feedwind, you can capture the attention of your visitors and encourage them to explore your Pinterest boards. In this blog post, we will discuss the best practices for optimizing your Pinterest widget for maximum engagement. Let’s dive in!

Ideal Placement for Your Pinterest Widget

The placement of your Pinterest widget plays a crucial role in capturing the attention of your website users. It’s essential to position the widget where it is easily visible, such as the above-the-fold, sidebar, header, or footer. Experiment with different placements to find the one that works best for your website’s layout and design.

How to Choose the Right Pinterest Widget Type for Your Website

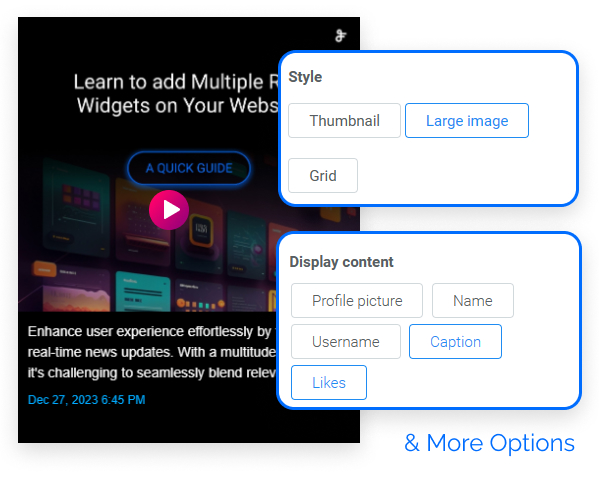
Feedwind offers various types of Pinterest widgets to choose from, such as thumbnailcard, and overlay widgets. Consider the nature of your content and the overall aesthetic of your website when selecting a widget type. Card & Overlay widgets are ideal for displaying a collection of images.

Customizing Your Pinterest Widget’s Colors and Design to Match Your Website

To create a seamless visual experience for your visitors, customize your Pinterest widget’s colors and design to match your website. Use the customization options in Feedwind to select colors that complement your brand, adjust the widget’s dimensions, and choose a layout that suits your website’s overall look and feel.

Using Captions and Descriptions to Make Your Pinterest Widget More Engaging

Captions and descriptions are powerful tools for adding context and enhancing the engagement of your Pinterest widget. When adding images to your Pinterest boards, make sure to include informative and compelling captions. These captions will be displayed within the widget and can entice your visitors to click and explore further.

How to Promote Your Pinterest Widget and Encourage Visitors to Share Your Content

Promoting your Pinterest widget is crucial for expanding your reach and encouraging visitors to share your content. Share links to your widget page on social media platforms, and embed it in blog posts. Encourage visitors to share your widget by adding social sharing buttons and CTAs that prompt them to save or pin your content.

FAQs

1. Can I have multiple Pinterest widgets on my website?

Absolutely! You can create multiple Pinterest widgets using Feedwind and display them in different sections of your website.

1. How often should I update my Pinterest widget? 

It’s a good practice to update your Pinterest widget regularly to showcase fresh and relevant content. Consider adding new pins or refreshing the widget whenever you have new content to share.

3. Can I track the performance of my Pinterest widget?

Yes, Feedwind provides tracking options that allow you to monitor the performance of your Pinterest widget, by a number of views.

Implement these best practices and watch as your Pinterest widget becomes a valuable tool in boosting engagement, driving traffic, and increasing the visibility of your brand or content. Start creating your optimized Pinterest widget with Feedwind today and unlock the full potential of visual storytelling on your website. Let’s get started!

Facebook posts: Enhance your brand’s online presence with custom overlay design

$
0
0

Stand Out with Custom Overlay Designs

While images play a vital role in catching the eye, the design elements surrounding them are equally important. Custom overlay designs provide an excellent opportunity to infuse your brand’s personality into your Facebook posts. With overlays, you can add captivating text, branded elements, or eye-catching graphics that complement your image and reinforce your message.


Easy Steps

Widget Settings
  1. Create widget -> Facebook
  2. Feed URL -> https://www.facebook.com/FeedWind/
  3. General -> Width -> Responsive/In Pixels -> Responsive
  4. General -> Style -> Large Image
  5. General -> Height -> Posts -> 2
  6. General -> Scroll -> ON
  7. General -> Scroll -> Horizontal
  8. General -> Scroll -> Navigation Arrow -> ON
  9. General -> Scroll -> Autoscroll -> ON
  10. General -> Advanced Settings -> Custom CSS link -> Show custom css
    Note: Copy CSS from below, paste into your CSS file [your-file-name.css] , make changes as per your need and upload to your server or in Dropbox [ Check How to host CSS on Dropbox Click here], copy the complete CSS path [e.g. http//example.com/css/your-file.css] and paste in "Custom CSS Link" field in Feedwind setting.
    
    /* Copy CSS From Here  */
    #fw-fb-feed-items .fw-fb-feed-item-content-module {
        margin: 0;
        padding: 0;
        overflow: hidden;
    }
    #fw-fb-feed-items .fw-fb-feed-item-large-image {
        border-radius: 0;
        height: 254px;
        background-size: cover;
        background-position: center center;
        overflow: hidden;
        margin: 0;
    }
    
    #fw-fb-feed-items .fw-fb-feed-item {
        margin: 0;
        padding: 0;
        clear: both;
        position: relative;
    }
    
    .fw-fb-feed-item-content-module:after {
        content: '';
        background-color: #000000b7;
        position: absolute;
        width: inherit;
        height: 35%;
        bottom: 0;
        left: 0;
        right: 0;
        transition: all 0.3s linear;
        z-index: 0;
    }
    #fw-fb-feed-items .fw-fb-feed-item:hover .fw-fb-feed-item-content-module:after {
        background-color: #5f08ffb7;
    }
    header {
        background: linear-gradient(90deg, #52CA1D 0%, #006DFF 100%);
    }
    
    span.fw-fb-feed-item-description {
        position: absolute;
        padding: 2rem;
        bottom: 12%;
        text-align: center;
        z-index: 1000;
    }
    
    
    span.fw-fb-feed-item-date {
        position: absolute;
        bottom: 5%;
        left: 50%;
        transform: translateX(-50%);
        z-index: 12;
        transition: all 0.3s linear;
    }
    
    #fw-fb-feed-items .fw-fb-feed-item-large-image {
        height: 450px;
        transition: all 0.3s linear;
    }
    /*   CSS Ends Here  */
    
  11. Rest keep as default

Instagram Widget Token Issue

$
0
0

Instagram Facebook Widget

This support article’s purpose is to verify your Instagram Token and Instagram widget configuration. You must have a Facebook page and an Instagram business account.

In order to set up the Instagram widget correctly, we will require the following 3 things.

  1. Facebook Page
  2. Instagram Business Account (watch video)
  3. Link your Instagram Business account to your Facebook Page

Instagram token expired

How to solve when the Instagram token has expired when you see the following alert in your Feedwind account. Simply click on the “Verify” button.

Instagram Token Expire Notification

Instagram account Linking Issue with Facebook Page

After you click on “Verify” in the above step, a new dialogue box will appear to link your Instagram account to your Facebook Page. Please add your Instagram business profile account and click “Next”.

Instagram Account Link With Facebook

Link your Instagram Business account to your Facebook Page

You can easily connect your Facebook page with your Instagram account by following the below steps.

Step:1 – Please login into your Instagram account and make your account “Business / Professional” instead of “Personal”. Please go to the “settings” page.

Instagram Business Account

Instagram Business Account

Step:2 – Please login into your Facebook account and open Your Facebook Page settings.

Instagram Business Account

Step:3- Please Open your Facebook Page – Click the “Pages” option

Instagram Business Account

Step:4 – Please click your Facebook Page settings where you want to connect your Instagram Business account.

Instagram Business Account

Step:5 – Please open your Facebook page “settings” screen.

Instagram Business Account

Step:6 – In Page settings, select the “Instagram” option and click the “Connect Account” right-side option.

Link Instagram account to Facebook Account

Step:7 – Allow Instagram account access permission.

Instagram Account Permission

Step:8 – Please log in into your Instagram account.

Login Instagram Account

Step:9 – Please try again to configure your Instagram widget.

FeedWind Widget Options

Let’s start creating an Instagram widget

Why is the widget token getting expired?

We would like to share a use case when a token can expire: Something like you have created a Facebook or Instagram widget but you are not using the widget anywhere in your other applications/websites etc. and even if you have not browsed the widget from the FeedWind application within the last 60 days, the token will expire and you need to follow the authorization process to revalidate it.

How to add or change the Facebook Page connected to your Instagram business account

$
0
0

connect-facebook-with-instagram

Instagram is a photo and video-sharing social networking service. The app allows users to upload media that can be edited with filters and organized by hashtags and geographical tagging.

Why do you need to connect the Facebook page to your Instagram account?

If you want to get additional features to promote your business on social media, We would like to share the benefits of connecting your Facebook page to your Instagram account.

  • Promote your articles and stories. In some regions, you’ll need to claim a Facebook Page in order to advertise on Instagram.
  • Get started with shopping on Instagram. In addition to meeting business requirements, you will need to have a linked Facebook page to set up shop on Instagram.
  • Use your page to run Instagram and Facebook ads. From your page, you can create ads that will appear on Facebook and Instagram.
  • post efficiently. When your page and professional account are linked, you can share posts on both platforms. If you choose to advertise from your Facebook page, you can also reach more people with your ads because they can also run on Instagram.
  • Pay for promotions conveniently. By linking Facebook and Instagram, you’ll be able to use the payment method you use on Facebook on Instagram. You can also pay for promotions from the Instagram app if that works better for your business.
  • Manage your messages. When you link Facebook and Instagram, you can manage your messages across Messenger and Instagram from a single unified inbox.
  • Sync your company’s contact information. After you link Facebook and Instagram, the Facebook page and Instagram account can edit contact information for one another for consistency.
  • Gain access to cross-app tools. By linking Facebook and Instagram, you’ll gain access to tools such as appointment booking buttons, donation stickers, and camera effects.

How do you link a Facebook Page to a business account?

To modify the Facebook page connected to your Instagram business account:
  • Go to your Instagram profile.
  • Select “Edit profile.”
  • Under Public business information, Select a Page.
  • Tap “Create Facebook Page or Connect to an existing Page.”
  • Choose a page from your pages that you’d like to connect to or select Create a new Facebook Page.
  • Tap Done after you’ve selected a page or created a new page.

 IG Profile Page options

Your business account now connects to a Facebook page. If the page you’d like to connect to is not showing in the drop-down from your profile, it may be you are not an admin of that page. Check your page’s settings and make sure you have permission to add that page to your Instagram business profile.

How to integrate Pinterest into your blogging strategy

$
0
0

Pinterest is a visual discovery engine for finding ideas like kids’ learning, recipes, home decoration, and more. With billions of pins on Pinterest, you’ll always find new ideas to spark your inspiration. When you discover Pins you love, save them to boards to keep your ideas organized and easy to find. You can also create pins to share your ideas with other people on Pinterest.

4 Bests ways to integrate Pinterest and RSS feeds for maximum social media success

RSS Pinterest integration

If you use Pinterest as an RSS, the widget will display the latest pins of the user RSS.

In order to retrieve the URL, just add /feed.rss/ to the end of your Pinterest account URL. You can get it by clicking on your profile icon. To illustrate this, we will use the Pinterest URL of the blogger Caitlin Cawley.

  1. Her Pinterest account URL is – https://www.pinterest.com/caitlin_cawley/
  2. Now we just need to add /feed.rss/ to the end, and we got what we need for Step 2. Final URL – https://www.pinterest.com/caitlin_cawley/feed.rss

Pinterest widget for WordPress

You can easily set up the Pinterest widget in WordPress within a minute (WordPress integration).

Pinterest widget for bloggers

Google Blogger is a very popular content management system. You can easily configure Pinterest widgets on bloggers’ websites.

Shopify RSS feed for Pinterest 

Easily embeds FeedWind widget code in the Shopify site.

  1. Copy the code from the FeedWind account widget copy snippet to clipboard
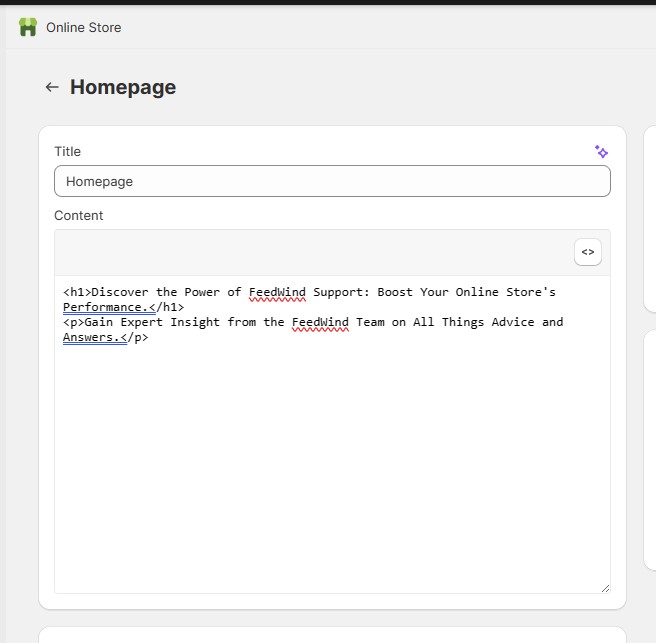
  2. Log into your Shopify account and navigate to the page where you would like to embed your FeedWind widget. Here, select the “< >” icon near the text editor.
  3. Paste the code inside the text editor and click save, & we are done!

If you need any help please feel free to contact us!


Add a widget to WordPress via Elementor

$
0
0

elementor-builder-pluginElementor is a website builder plugin that gives users easy-to-use drag-and-drop functionality to create stunning websites without coding. It has many widgets and endless customization options in motion effects, animations, custom CSS, dynamic content, and more. Elementor is a widely used plugin on WordPress websites. This article will show how to add widget via Elementor

Add the FeedWind widget to the WordPress page

  1. Install and activate the Elementor plugin in WordPress admin.
    elementor-plugin-activate
  2. Select any specific page where you would like to add the widget.
    wordpress-select-pag
  3. Select Elementor editor
    Click on “Edit with Elementor” to add a widget
    elementor-page-edit
  4. Now, let’s drag and drop the HTML(</>) element on the page.
    drag-drop-elementor-html-elementor
    Next, lets add our widget code in HTML editor and click ‘Update’
    Paste-widget-code-in-HTML-Editor
  5. You can review your changes by clicking on ‘?’ (Eye icon).
    Click-on-Eye-Icon-to-review-changespreview-widget-elementor

Now we have successfully installed the widget into the WordPress site using the Elementor plugin.

Please let us know if need any assistance setting up customize widget demo or contact us.

Three most frequent issues with RSS feeds, along with solutions

$
0
0

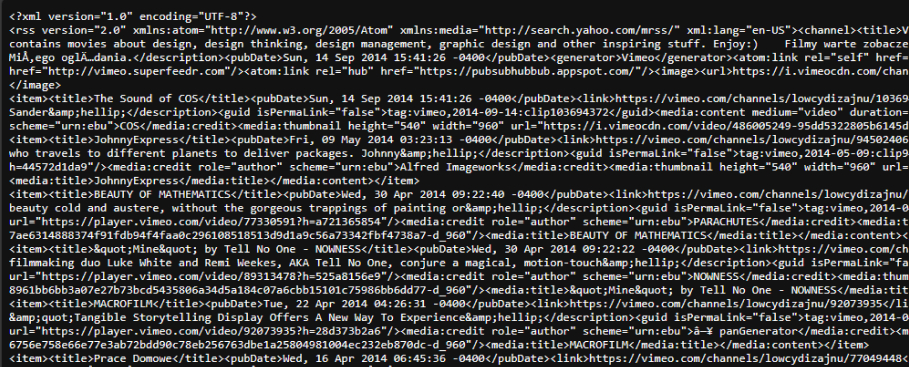
RSS feed solutionsThe coding for RSS feeds is done in XML(eXtended Markup Language), which is somewhat similar to its more well-known sibling HTML but does not include stylistic information, is used to code RSS feeds. XML is used to provide a description of the content of the source data.

An RSS feed only has two parts for this reason: the content itself and the header, which contains the feed’s title, description, and link, if applicable (the entries in the feed). It ends there. uncomplicated, and those without coding experience will find it relatively easy to learn.
Yet RSS feeds can have errors, just like any other piece of code. This is partially due to the numerous RSS iterations, which cause users to be uncertain of the standards. The lack of a central organisation that standardises these specifications exacerbates another issue.

Faulty RSS feed

Users should be aware that an RSS feed must follow predefined standards in order to function properly, despite the apparent adaptability of XML. The work is not nearly as simple due to the various RSS revisions and the fact that feed readers still occasionally trip over different components. It is best to run your RSS feed through a validator service to ensure that everything is correct and legal. If you made your own RSS feed, you must finish this necessary step. One of the best tools for the job is the W3C.org RSS feed validator, which is also free.

To make your feed more dynamic, if you’re RSS-compliant, you can add almost any kind of media (should you is a different topic, which we’ll get to in a moment). Since RSS does not support adding programmes or scripts to feeds due to security concerns, this cannot be done.

Timeout issues

Timeout issues happen when an RSS feed reader tries to crawl an RSS feed from a website but is unable to do so because the server responds to a data request too slowly. For RSS to work as intended, the feed must always be accessible to readers or other aggregation services.
You should speak with your hosting provider and let them know what is happening. However, the RSS feed itself could also be to blame for this problem. Because a large RSS feed is difficult to crawl, its size must be taken into consideration.

Size restrictions

The XML file should be compact. This is because users typically subscribe to RSS feeds for the most recent posts and aggregators will download a feed multiple times. Therefore, feed files must be as small as possible, with 512 KB being the maximum allowed, or else your feed won’t be downloaded or won’t be updated more frequently for the simple reason that it will be inconvenient.

To completely avoid this kind of issue, it is preferable to restrict your RSS feed to the most recent posts, delete outdated feeds, and preserve only what is absolutely necessary. There are no supplemental graphics or details. If you opt for this approach, headaches in the future will be avoided.

Create RSS widgets with FeedWind in minutes. Get started now.

Please let us know if need any assistance setting up customize widget demo or contact us.

Step-by-Step Guide to Install FeedWind Widget on Your Website Using Divi Builder Plugin

$
0
0

Adding the FeedWind widget to your website using the Divi Builder plugin is a simple and straightforward process. In this article, we’ll walk you through the steps of installing the FeedWind widget on your websiteMain banner for Divi support article using the Divi Builder plugin.Main banner for Divi support article

Step 1: Get the FeedWind Widget Code

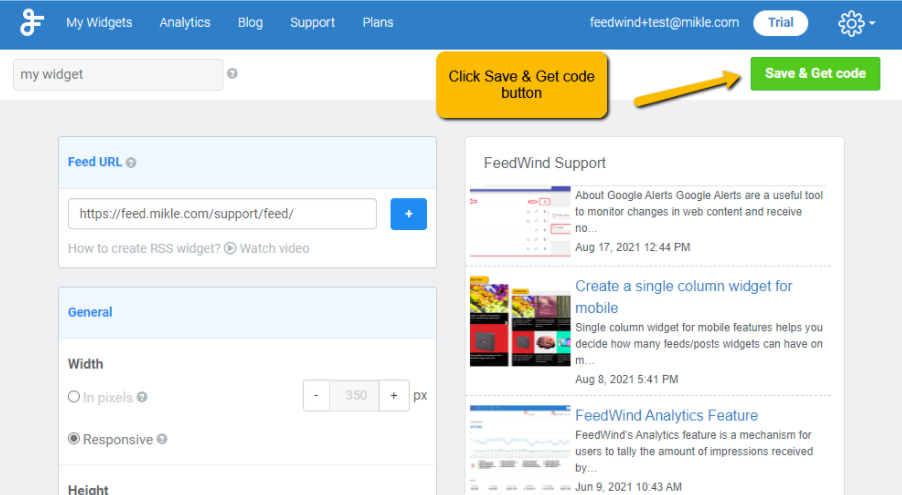
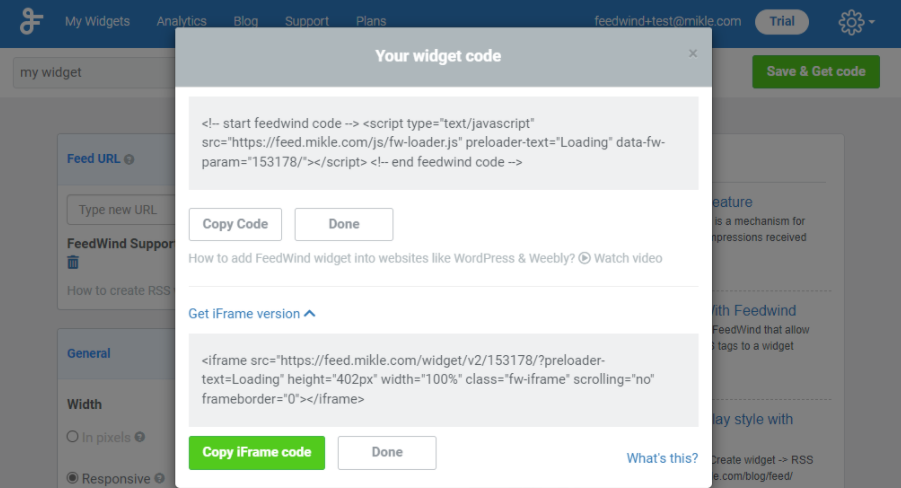
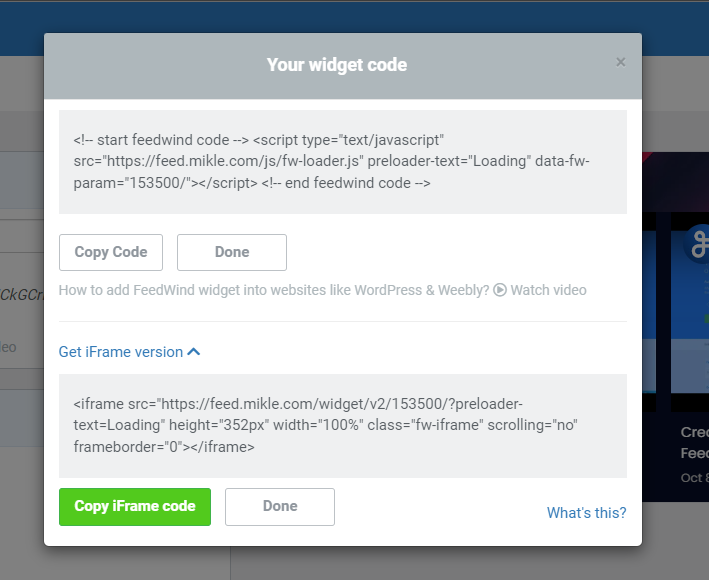
Before you can add the FeedWind widget to your website, you’ll need to get the widget code. To do this, login to your FeedWind account, go to the “My Widget” page, and select your widget. Here, you may edit the widget to your preferences in terms of its size, colour, and content. Once the appropriate changes have been made, click “Save & Get Code” and copy the code that displays.

Step 2: Install the Divi Builder Plugin

Installing the Divi Builder plugin on your website is the next step. You can download the plugin from the Elegant Themes website if you don’t already have it installed. The FeedWind widget will be added to your website when the plugin has been installed and activated.

Step 3: Let’s add the Widget to Your Website

To add the FeedWind widget to your website using the Divi Builder plugin, follow these steps:

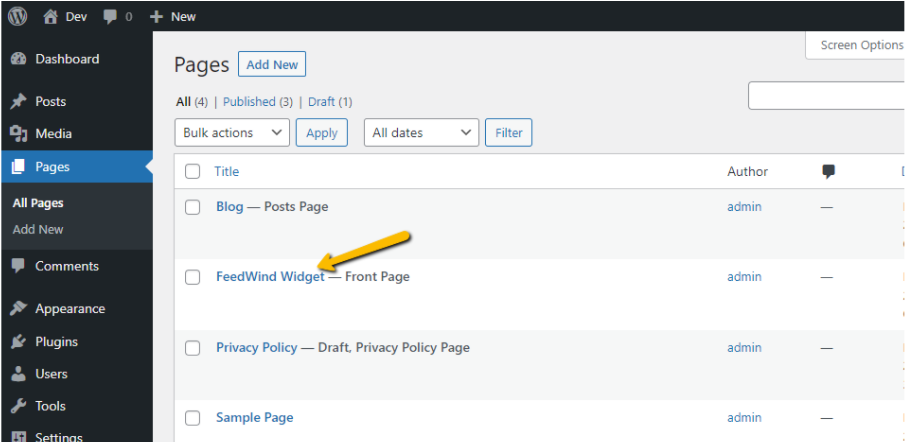
  1. Go to your WordPress dashboard and select the page where you want to add the widget. 
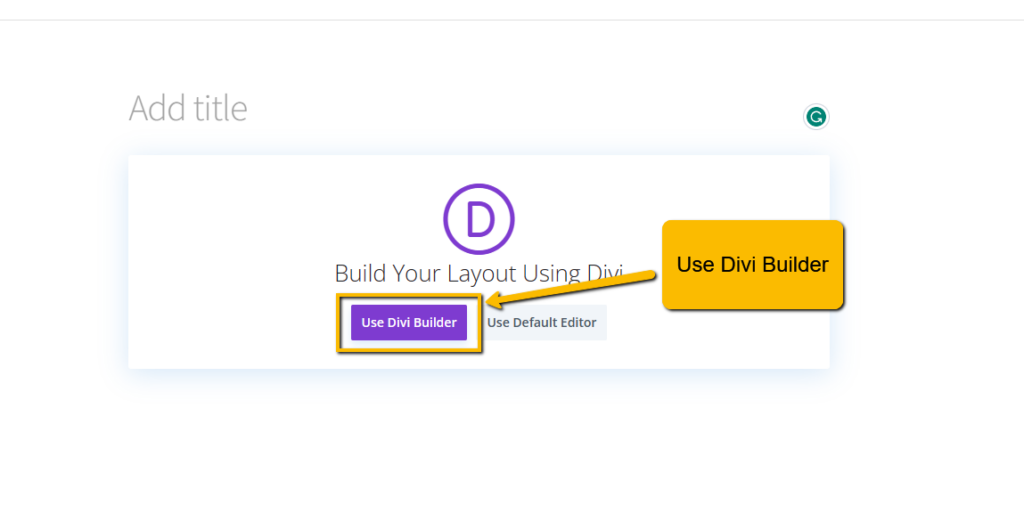
  2. Click the “Edit with Divi Builder” button to open the Divi Builder editor.


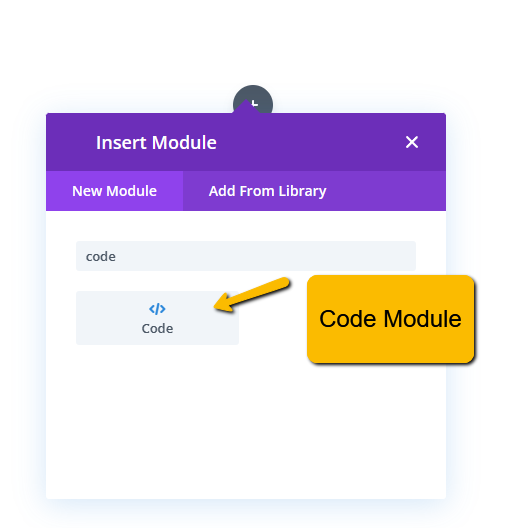
  3. In the Divi Builder popup modal, click the “New Module” button and select the “Code </>” 
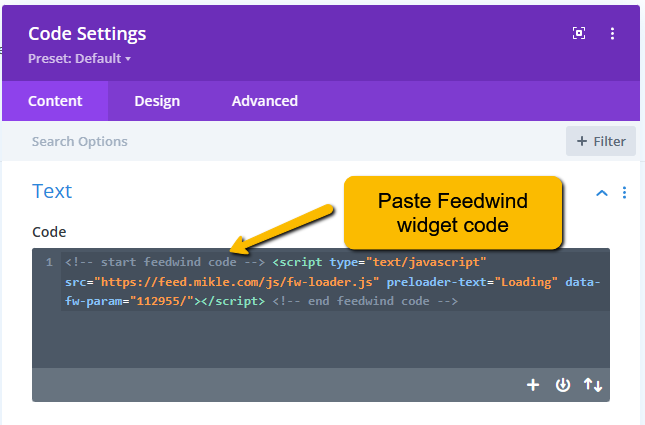
  4. In the Code Module, paste the FeedWind widget code you copied in Step 1.
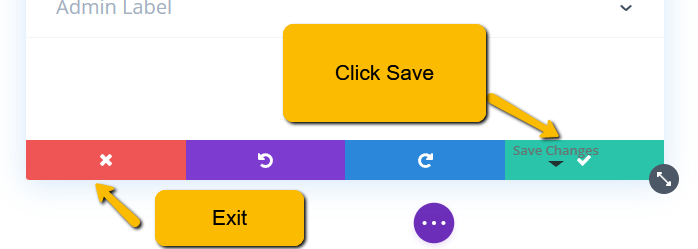
  5. Customize the module as needed and click the “Save” button to save your changes. 
  6. Preview your page to make sure the FeedWind widget is appearing as expected. To make your changes live, click the “Publish” button if everything seems fine. 

That’s all! With the Divi Builder plugin, you can easily add the FeedWind widget to your website. The widget will now show live RSS feeds from your favourite websites, keeping your blog or website up to date with the most recent happenings.

The Divi Builder plugin makes it simple and quick to add the FeedWind widget to your website.

Please let us know if need any assistance setting up customize widget demo or contact us.

Top 10 News Feed Across the Globe

$
0
0
Top 10 News Feed Across the Globe

The world is constantly changing, and it can be hard to keep up with all the latest news. With the rise of digital platforms, news feeds have become a crucial source of information, catering to a global audience hungry for updates on a variety of topics. In this article, we’ll explore the top 10 news feeds from across the world, offering diverse perspectives and insights that go beyond the headlines.

Trusted Global News Feed Sources

  1. BBC News: BBC News stands as a pinnacle of reliable and unbiased journalism. Known for its comprehensive coverage of international events, politics, culture, and more, the British Broadcasting Corporation ensures that readers are well-informed on a broad spectrum of topics.
    Feed: BBC News – XML Feed (bbci.co.uk)
  2. CNN: Cable News Network (CNN) has maintained its reputation as a global news leader for years. With correspondents stationed worldwide, CNN delivers breaking news, investigative journalism, and thought-provoking analysis to millions of viewers and readers.
    Feed: RSS (Really Simple Syndication) – CNN.com
  3. Al Jazeera: Al Jazeera, based in Qatar, has established itself as a voice for the Middle East and beyond. With a focus on in-depth reporting and diverse viewpoints, Al Jazeera offers an alternative perspective on global affairs.
    Feed: aljazeera.com/xml/rss/all.xml
  4. The New York Times: A cornerstone of American journalism, The New York Times covers an array of subjects with deep insight and investigative prowess. From politics and business to culture and science, this publication is a must-read for those seeking a well-rounded news experience.
    Feed: RSS Feeds – The New York Times (nytimes.com)
  5. Reuters: Renowned for its accurate and speedy reporting, Reuters is a leading source of international news. Navigating financial markets, dissecting political landscapes, exploring cutting-edge technology, and more – Reuters provides impactful information that resonates with both global citizens and businesses alike.
    Feed: Best RSS Feeds | Reuters News Agency (reutersagency.com)
  6. The Guardian: Hailing from the United Kingdom, The Guardian is celebrated for its commitment to in-depth reporting and progressive perspectives. Covering everything from social issues to environmental concerns, it offers a holistic view of the world’s events.
    Feed: Stay up to date with our RSS feeds | Help | The Guardian
  7. Le Monde: As France’s most respected newspaper, Le Monde offers a unique lens on global news, politics, and culture. With a reputation for balanced reporting and insightful analysis, it remains a staple for Francophiles and global readers alike.
    Feed: The RSS feeds of lemonde.fr
  8. Hindustan Times: Based in India, Hindustan Times provides a comprehensive look at local and international news. Its coverage spans politics, business, sports, entertainment, and more, catering to a diverse readership.
    Feed: Rss | Hindustan Times
  9. Japan Times: For those interested in news from Asia, Japan Times offers a wealth of information about Japanese culture, society, and global affairs. Its bilingual approach ensures access to news for both Japanese and English-speaking audiences.
    Feed: japantimes.co.jp/feed/
  10. Sydney Morning Herald: Representing the Southern Hemisphere, the Sydney Morning Herald covers a wide range of topics from an Australian perspective. From regional news to global events, it serves as a valuable source of information for readers down under.
    Feed: RSS Feeds | The Sydney Morning Herald (smh.com.au)

Staying informed about global events and diverse perspectives is easier than ever, thanks to the top 10 news feeds from around the world. From the reliable reporting of BBC News to the in-depth analysis of The New York Times, these sources provide a comprehensive view of current affairs. To further enhance your news consumption experience, consider integrating a Feedwind widget on your website. With Feedwind, you can seamlessly aggregate and display updates from these reputable news feeds, offering your readers a dynamic and engaging way to stay informed. Embrace the power of knowledge and keep your audience engaged with the latest news through the convenience of a Feedwind widget. Let’s get started!

Add a Dynamic Sports Widget to Your Website

$
0
0

Sports widget, imagine having a dedicated corner on your website where the latest sports updates, scores, and thrilling moments are showcased in real-time.

sportstream widget

A dynamic Sports widget is like having a live scoreboard right on your website. It’s a tool that allows you to display real-time sports content, including scores, news, and highlights, without your visitors ever having to leave your site. Whether your audience is into basketball, soccer, tennis, or any other sport, this widget can deliver the action directly to them, enhancing their experience and increasing their engagement.

Increase User Engagement

Imagine your website visitors staying longer, interacting more, and coming back frequently. A dynamic sports widget can make that a reality:

Increased Engagement

Real-time content is inherently engaging. With a sports widget, visitors will spend more time on your site, exploring the latest updates and immersing themselves in the excitement of the game.

Lower Bounce Rates

When visitors find valuable and interactive content, they’re less likely to leave immediately. A sports widget can help reduce bounce rates and increase the chances of converting those visitors into customers or subscribers.

Level Up User Experience

By offering them real-time sports updates, you’re delivering a memorable and enjoyable experience. Making your website stand out is all about staying true to your brand’s style. Discover how Feedwind’s dynamic sports widget lets you tailor the appearance to create a seamless and immersive user experience.

How to Add FeedWind Sports Widget to Your Website

Getting started with FeedWind’s sports widget is a breeze:

  1. Sign Up: Create an account on FeedWind’s platform.
  2. Choose Your Sports: Select the sports you want to display updates for.
    Example – Skysports RSS Feed
  3. Customize Appearance: Match the widget’s look to your website’s branding.
  4. Generate Code: FeedWind will provide you with a code snippet.
  5. Embed the Code: Simply paste the code into your website’s HTML where you want the widget to appear.

Incorporating a dynamic sports widget from FeedWind into your website is a game-changer. It adds value to your website and increases user engagement. With its easy integration and customization options, FeedWind makes the process a breeze. So why wait? Level up your website’s game today with FeedWind’s sports widget and score big with your audience!

Need help in creating a custom design sports widget contact us.

How to Add a Weather Widget on Your Website: A Step-by-Step Guide

$
0
0
Weather widget

Do you want to add a weather widget to your website? In this step-by-step guide, we will show you how to do it using FeedWind, a popular and user-friendly widget generator. Weather widgets provide real-time weather updates and enhance the overall user experience. Whether you’re a blogger, a news website, or someone who loves keeping up with the latest weather updates, this tutorial is for you. Say goodbye to the hassle of checking multiple websites and welcome the convenience of having the weather forecast right at your fingertips. We will also explore the benefits of using FeedWind’s weather widget and discuss the different types of weather widgets available.

Let us Get Started

  1. Step 1: Sign up for an account on FeedWind
    To get started, visit the FeedWind website (www.feedwind.com) and sign up for a free account. Fill in the required details and create your login credentials.
  2. Step 2: Create a new widget
    Once you’ve signed up and logged in, you’ll be directed to the dashboard. Click on the “Create New Widget” button and then select ”RSS Widget” from the popup to begin creating your weather widget.
  3. Step 3: Choose the weather feed source
    FeedWind offers multiple weather feed sources to choose from. Select the one that suits your needs best. Here are some of the best sources for live weather conditions that also provide RSS feeds:
  4. Step 4: Customize your weather widget
    After selecting the weather feed source, you can customize various aspects of your weather widget. This includes choosing the layout, color scheme, font style, and size. You can also add additional elements such as location names and temperature units.
  5. Step 5: Generate the widget code
    Once you’re satisfied with the customization options, click on the “Generate Code” button. FeedWind will generate a code snippet specifically tailored for your weather widget.
  6. Step 6: Copy and paste the code into your website
    Copy the generated code snippet and navigate to your website’s HTML editor or content management system (CMS). Locate the section of your website where you want the weather widget to appear and paste the code there. Save the changes.
  7. Step 7: Preview and test the widget
    After embedding the code, preview your website to see how the weather widget looks and functions. Test its responsiveness and ensure that it displays accurate weather information.

Benefits of using FeedWind weather widget

  1. Easy to use: FeedWind provides a user-friendly interface that makes it simple for anyone, regardless of technical expertise, to embed a weather widget on their website.
  2. Real-time updates: The weather widget powered by FeedWind ensures that your visitors receive up-to-date weather information without any delays.
  3. Customization options: With FeedWind, you have the freedom to customize your weather widget to match the design and branding of your website. You can choose from various layouts, color schemes, and font styles to create a seamless integration.
  4. Multiple weather feed sources: FeedWind offers a wide range of weather feed sources, allowing you to select the one that best suits your location and preferences.

Different types of weather widgets

  1. Current weather widget: This type of widget displays the current weather conditions, including temperature, humidity, wind speed, and more.
  2. Forecast widget: Forecast widgets provide users with a glimpse into the future by displaying the predicted weather conditions for the upcoming days or weeks.
  3. Radar widget: Radar widgets show real-time radar images of precipitation patterns in a specific area.
  4. Satellite widget: Satellite widgets display satellite images of cloud cover and other atmospheric conditions.

By showcasing multiple types of weather widgets on your website, you can provide visitors with a comprehensive view of the current and forecasted weather conditions in an engaging and visually appealing manner.

Embedding a weather widget on your website using FeedWind is a straightforward process that offers numerous benefits. With its easy-to-use interface, customization options, and support for various weather feed sources, FeedWind allows you to enhance your website’s functionality and provide valuable information to your visitors. Whether you choose to display the current weather, forecast, radar images, or satellite imagery, incorporating a weather widget can greatly improve the user experience on your website. Check out an example of a weather widget.

Create an Apple Music widget

$
0
0

In the digital age, a music widget can significantly enhance the user experience on your website. Apple’s vast library of music, accessible through the iTunes RSS widget, offers an excellent opportunity for this. This article will guide you on integrating this music widget into your website using FeedWind.

You can create an iTunes RSS widget in just minutes using FeedWind. The iTunes RSS Feed Generator is a handy tool allowing you to create an RSS feed from any of their movies, music, audiobooks, etc. You can choose a type of list, country, and media type. You can also choose how many items will appear in the feed using the “Result limit” option.

What is the iTunes RSS Widget?

The iTunes RSS widget is a music widget that allows you to display content from Apple’s iTunes Store directly on your website. It uses Really Simple Syndication (RSS) feeds from iTunes to show the latest music, podcasts, TV shows, movies, and more.

iTunes RSS Feed Generator

Why Use FeedWind with Your Music Widget?

FeedWind is an easy-to-use RSS feed aggregator that can help you customize and embed RSS feeds on your website. When used with the iTunes RSS widget, it allows you to tailor the look and feel of the widget to match your site’s design.

How to Integrate Your Music Widget with FeedWind

Here are the steps to integrate your widget with FeedWind:

  1. Get the iTunes RSS feed URL: Go to the iTunes RSS Feed Generator -> https://rss.applemarketingtools.com/, select your preferences, and copy the generated feed URL.
  2. Set up FeedWind: Visit FeedWind’s website, sign in or create an account, then click on “Create RSS Widget.”
  3. Configure your feed: Paste the copied iTunes RSS feed URL into the “RSS Feed URL” field. Customize the appearance as desired.
  4. Embed the feed on your website: Once you’re satisfied with how your feed looks, click “Save & Get code.” Copy the provided code and paste it into your website’s HTML where you want the feed to appear.

Here is an example of an iTunes widget.

Integrating a widget like the iTunes RSS widget using FeedWind is a great way to enhance your website with Apple’s music content. It not only enriches your site but also keeps your audience engaged with up-to-date content from one of the world’s leading entertainment providers.


Add a Custom Shopify HTML Widget to Your Website

$
0
0

In this step-by-step guide, we’ll explore how to enhance your Shopify store by adding a custom Shopify HTML widget using FeedWind. This dynamic widget allows you to display external content seamlessly. Follow these instructions to elevate your Shopify storefront.

Step 1: Generate FeedWind Widget Code

Head over to FeedWind and create your custom widget. Check here for how to get an RSS feed from any Shopify website. Once configured, copy the provided HTML code.

widget copy snippet to clipboard

Step 2: Sign in to Your Shopify Account

Log in to your Shopify admin dashboard. If you don’t have an account, sign up for one.

Step 3: Navigate to the Online Store

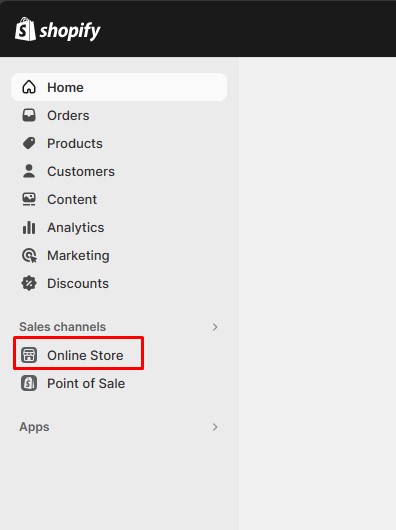
Go to the “Online Store” section in your Shopify admin panel.

Step 4: Select Pages Menu

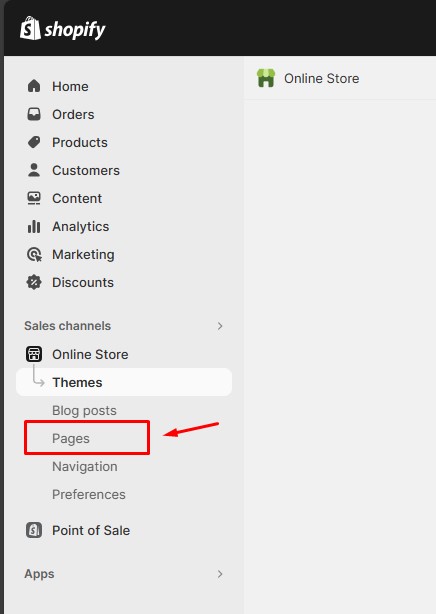
Go to ‘Online Store’ and navigate to the ‘Pages’ menu.

Step 5: Edit Code

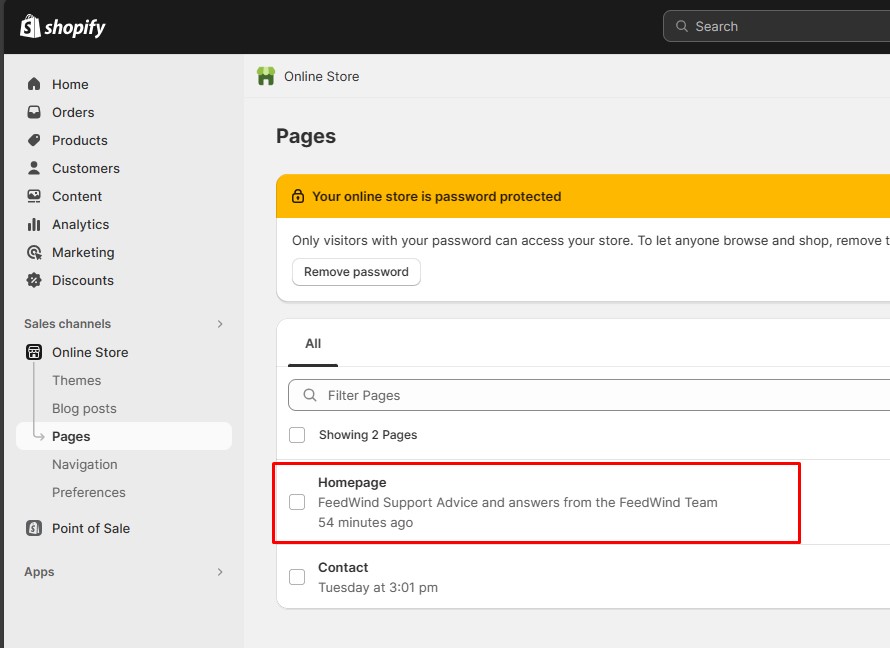
Identify the page where you want to embed the custom HTML widget. This could be on the homepage, contact pages, or a specific section.

Step 6: Edit the page to Add a custom HTML widget

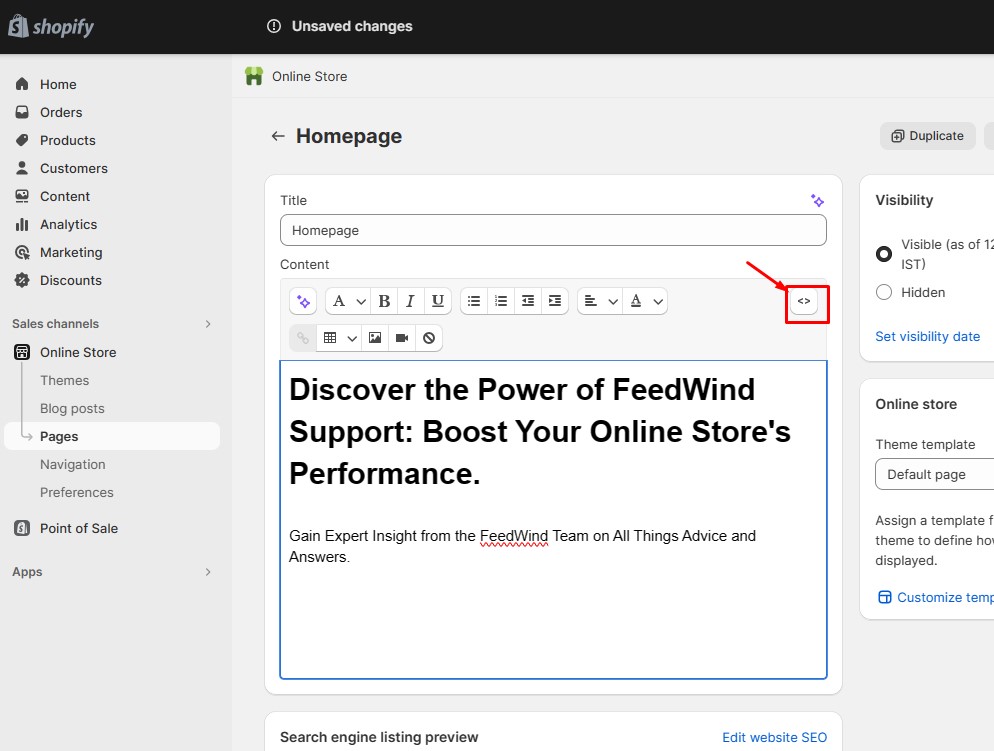
Click on the ‘Show HTML’ link, this will change visual editor mode into HTML mode.

Step 7: HTML mode

This will show page in HTML format.

Step 8: Paste Code

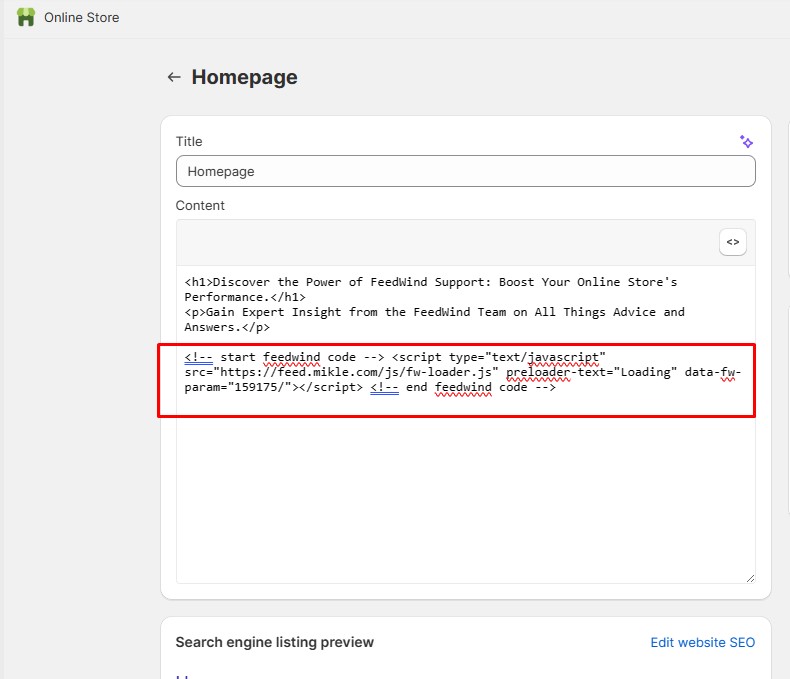
Paste the copied FeedWind HTML widget code from ‘Step 1’,  into the desired section. Ensure it is correctly placed within the HTML tags.

Step 9: Save Changes

Save the changes you made to the page.

Step 10: Preview and Adjust

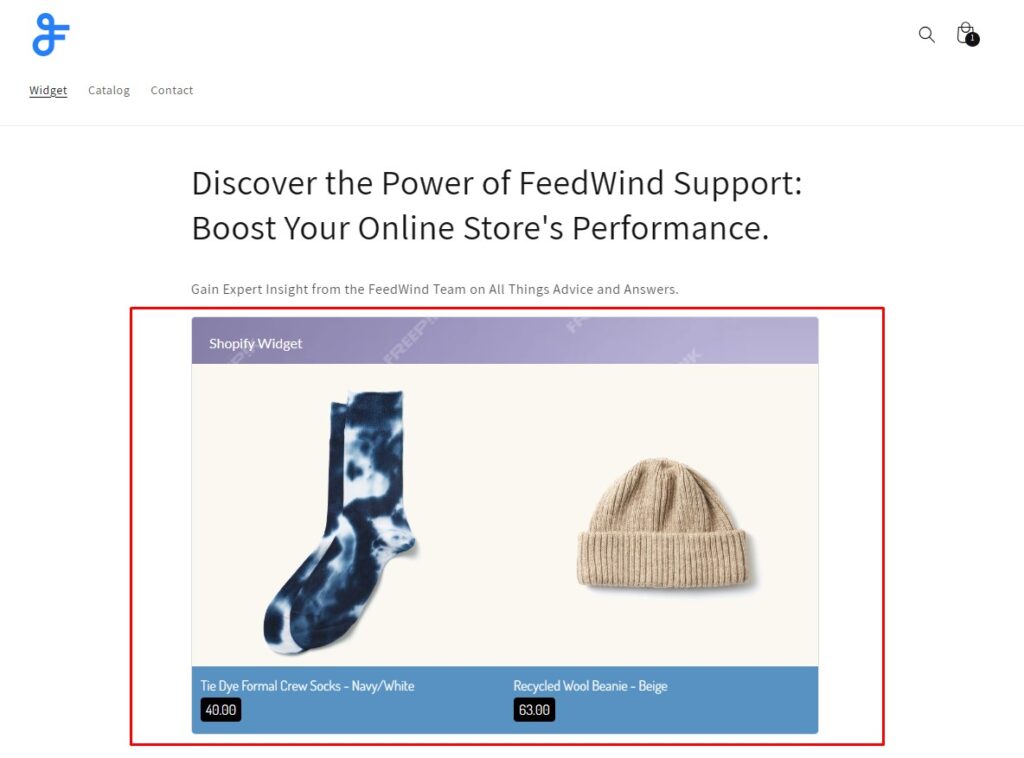
Preview your Shopify store to see the widget in action. Adjust the widget’s position or appearance as needed.

Step 11: Congratulations! 🙂

Congratulations! You’ve successfully added a custom HTML widget to your Shopify store using FeedWind. 

This dynamic feature enhances your store’s interactivity and provides a seamless way to integrate external content.

Feel free to explore further customization options within FeedWind to tailor the widget to your specific needs. Happy selling!

Generate WordPress RSS Feeds by each Category

$
0
0

WordPress, a popular content management system, provides an easy way to generate WordPress RSS feeds for each category.  This feature allows users to subscribe to specific categories of content, making it easier for them to find the information they’re interested in. Here’s how you can get RSS feeds for each category in WordPress.

Understanding RSS Feeds

RSS (Really Simple Syndication) is a type of web feed that allows users to access updates to online content in a standardized format. These feeds can be read using software called an “RSS reader”, “feed reader”, or “aggregator”, which can be web-based, desktop-based, or mobile-device-based.

How to Find RSS Feeds for Different Categories in WordPress

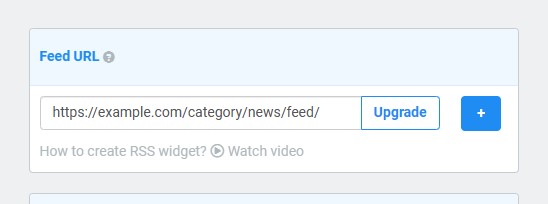
By default, each category on your WordPress website has its own RSS feed. You can locate this RSS feed by simply adding ‘feed’ at the end of the category page URL. For instance, if you have a category called ‘News’ with a URL like this: https://example.com/category/news/, then its RSS feed would be located at the following URL: https://example.com/category/news/feed/. You can find your category URL by visiting the Posts » Categories page and clicking on the ‘View’ link under a category.

find category in WordPress

Adding the WordPress RSS Feeds to Your Reader

If you want to add links to your category RSS feeds using the default WordPress settings, you can open up a page or post where you want to add the RSS feed links in the block editor. Once you are there, you can type the names of all the categories on your website in a List block. 

Category lists

After that, click the ‘Link’ icon in the block toolbar to open up the link prompt. Here, you can type the URL for your category RSS feed.

Link for category

You can repeat this process for each category RSS feed on your website by linking to it on the related name within the List block. Once you are done, don’t forget to click the ‘Publish’ or ‘Update’ button to save your changes. This will create a list of links to all your category RSS feeds. Check your website for a preview.

category RSS feeds lists

Displaying the Category RSS Feed on Your Site

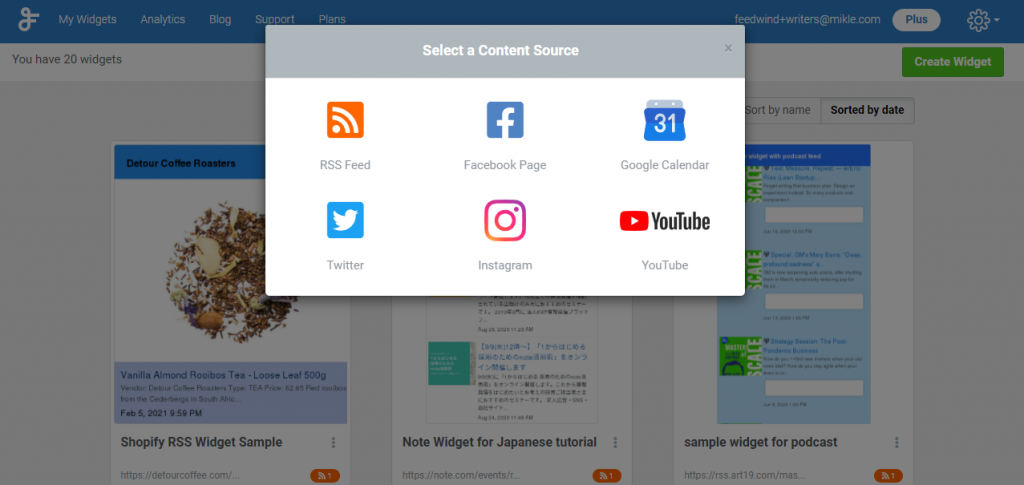
If you want to display the RSS feed for a category on your site, you can use the FeedWind RSS widget. Creating an RSS widget of a WordPress category using FeedWind involves a few steps. First, you need to log in to your FeedWind account and click on the Create Widget button. 

create widget button

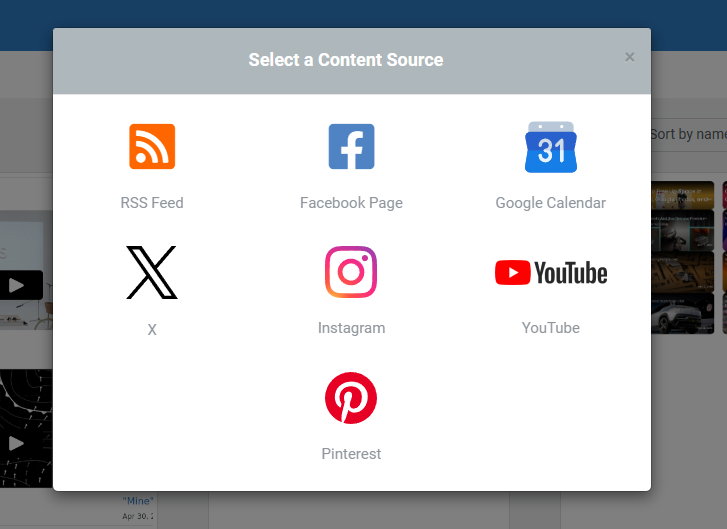
Then, select the content source you want to embed in your website, which in this case would be the RSS Feed.

Select-content-type

We will paste WordPress RSS Feeds created earlier into the source URL.

E.g. https://example.com/category/news/feed/

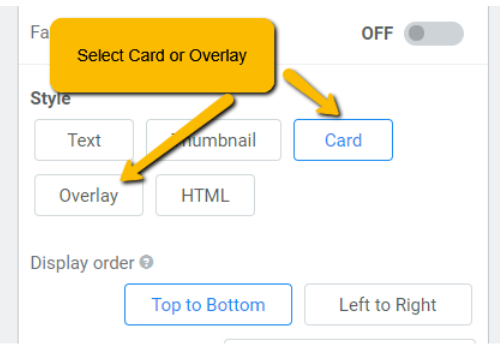
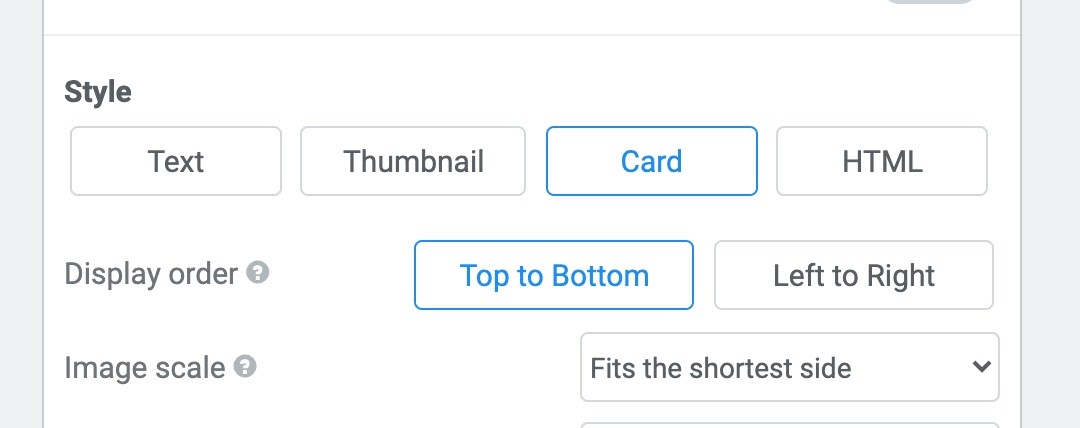
Next, adjust the parameters/settings in the setup screen as per your requirements.

style-by-card-and-overlay

Once you’re satisfied with the settings, click on the Save & Get code button. This will generate a script that you can copy.

save and get code button
widget copy snippet to clipboard

Finally, paste this script into your WordPress website where you want the widget to appear. This could be in a post, page, or a widget area like a sidebar or footer. And that’s it! You’ve successfully created an RSS widget of a WordPress category using FeedWind.

Test the RSS Feed

Finally, test the RSS feed to ensure it’s working correctly. You can do this by pasting the RSS feed URL into a FeedWind RSS widget. If the feed displays the correct posts for the category, then it’s working as expected.

Remember, each category on your WordPress site can have its own RSS feed. This allows your visitors to subscribe to the specific types of content that interest them the most.

For more detailed instructions, you can refer to the WordPress Codex.

Please note that the exact steps may vary depending on the version of WordPress you are using and any plugins or themes you have installed. Always make sure to back up your site before making any changes.

I hope this guide helps you set up WordPress RSS feeds for each category on your WordPress site.

Top 20 AI Tools for B2B Marketing in 2023: Enhancing Your Strategies with FeedWind

$
0
0

Unveiling the Power of AI Tools in B2B Marketing. The dynamic world of B2B marketing is undergoing a rapid transformation, driven by the game-changing advancements in artificial intelligence (AI). AI tools for B2B marketing offer a plethora of capabilities, empowering marketers to streamline operations, gain deeper customer insights, make informed decisions, personalize interactions, and ultimately drive business growth.

Top 20 AI Tools for B2B Marketing

To help you navigate the vast landscape of AI tools available, we’ve compiled a list of the top 20 AI tools specifically tailored for B2B marketing. In conjunction with FeedWind, a powerful RSS feed reader, you can effectively showcase these tools and their applications to your target audience.

Top 20 AI Tools for B2B Marketing

LinkedIn Sales Navigator
Leverage LinkedIn’s extensive data to identify and connect with potential customers, gain valuable insights into their profiles, and personalize sales pitches.
Visit the website: LinkedIn Sales Navigator

Leadfeeder
Uncover valuable information about the companies visiting your website, including their industry, size, and contact information, allowing you to target your marketing efforts more effectively.
Visit the website: B2B Lead Generation Software | Leadfeeder

leedfeeder
Crystal

Crystal
Gain insights into the communication styles and personalities of potential customers, enabling you to tailor your interactions for more personalized and effective engagement.
Visit the website: Crystal | The Personality Data Platform

Clearbit
Enrich your customer data with accurate and up-to-date information, including email addresses, phone numbers, and social media profiles.
Visit the website: B2B Marketing Intelligence | Clearbit

Clearbit
6Sense

6Sense
This tool utilizes AI to identify and prioritize high-value accounts, enabling you to focus your marketing efforts on the most promising opportunities.
Visit the website: 6sense – The Only ABM Platform Powered by Revenue AI™

SalesLoft
Streamline your sales process with AI-powered tools for lead qualification, opportunity management, and forecasting, boosting your sales productivity.
Visit the website: Salesloft: The Leading Sales Engagement Platform

Salesloft
ChurnZero

ChurnZero
Predict customer churn and identify early warning signs, enabling you to take proactive measures to retain valuable customers
Visit the website: Digital first Customer Success Software – ChurnZero

Einstein Analytics for Salesforce
Harness the power of AI within Salesforce to gain deeper insights into your customer data, identify trends, and make data-driven decisions.
Visit the website: Salesforce Einstein AI Solutions – Salesforce.com US

Salesforce
IBM Watson

IBM Watson Marketing
Utilize a suite of AI-powered marketing tools for personalized customer experiences, campaign optimization, and predictive analytics.
Visit the website: IBM Watson

Adobe Sensei Marketing Solutions
Leverage AI across the Adobe Marketing Cloud to enhance customer segmentation, ad targeting, and content personalization.
Visit the website: Adobe Sensei: machine learning and artificial intelligence

Adobe Sensei
Adobe Marketo

Marketo Engage
Employ AI to automate marketing tasks, streamline workflows, and optimize marketing campaigns for better results.
Visit the website: Marketo Engage – Marketing Automation Platform | Adobe

AI Marketing Cloud
Gain insights from customer data and interactions using AI to make informed marketing decisions and improve customer engagement.
Visit the website: AI Marketing Automation Platform | Smarketing Cloud

AI Marketing Cloud
Google Dialogflow

Google Dialogflow
Google Dialogflow is another popular AI platform for building chatbots. Dialogflow is easy to use and integrates well with other Google products, such as Google Cloud Platform and Google Analytics.
Visit the website: Dialogflow | Google Cloud

Pepper AI Sales Assistant
Utilize AI-powered sales assistants to guide sales representatives through interactions, provide real-time coaching, and improve sales outcomes.
Visit the website: Singapore’s Best Sales CRM Software | Pepper Cloud

Pepper
successeve

Successeve
Successeve is a Customer Intelligence Platform (CIP) that helps businesses grow by converting, retaining, and expanding their customer base.
Visit the website: Successeve: Customer Intelligence for B2B SaaS Companies

Gong
Analyze sales calls using AI to identify patterns, uncover coaching opportunities, and improve overall sales performance.
Visit the website: Gong – Revenue Intelligence Platform

Gong
Loom

Loom
Create and share personalized video messages with potential customers, enhancing engagement and increasing conversion rates.
Visit the website: Free screen recorder for Mac and PC | Loom

Seismic
Utilize AI to identify and deliver relevant sales content to potential customers based on their specific needs and interests.
Visit the website: #1 Global Sales Enablement Platform | Seismic

Seismic

Vidyard
Track the performance of your sales videos using AI to identify which content resonates most with your audience.
Visit the website: Vidyard – Video Tools for Virtual Sales and Marketing Teams

Demio
Enhance your webinar presentations with AI-powered tools for audience engagement, lead capture, and post-webinar follow-ups.
Visit the website: Demio – Hassle-free Webinar Software for Marketers

Demio

Leveraging FeedWind to Showcase AI Tools

FeedWind provides a powerful tool for effectively showcasing these AI tools and their applications to your target audience. By creating FeedWind widgets, you can easily embed curated content from relevant RSS feeds onto your website, blog, or social media platforms.

Here’s how you can use FeedWind to showcase AI tools for B2B marketing

  1. Gather RSS Feeds: Identify RSS feeds that provide reliable and up-to-date information on AI tools specifically relevant to B2B marketing. These sources may include industry publications, tech blogs, or AI tool provider websites.
  2. Create a FeedWind Account: Create a FeedWind account if you don’t already have one. The service offers both free and paid plans, catering to different needs and usage levels.
  3. Subscribe to Selected RSS Feeds: Within your FeedWind account, subscribe to the RSS feeds you gathered in the previous step. This will enable FeedWind to collect and organize content from these sources.
  4. Create a Widget: Access the “Create Widget” feature within FeedWind. Choose a widget type that suits your preferences, such as an RSS widget.
  5. Customize Widget Settings: Provide a clear title for your widget, such as “AI Tools for B2B Marketing Success.” Specify the RSS feeds you want to include and adjust the number of items to display.
  6. Categorize Content: Organize the widget’s content into categories, such as AI tools for sales, marketing automation, or customer relationship management (CRM).
  7. Integrate with Social Media: Link to relevant social media posts or discussions related to AI tools, fostering engagement and expanding reach.
  8. Embed the Widget: Once satisfied with the widget’s appearance and settings, generate an embed code snippet. Copy this code and paste it into your website, blog, or application.

By following these steps, you can create engaging and informative widgets that showcase the latest and most relevant AI tools for B2B marketing. This will help you:

  • Attract potential customers
  • Establish your brand as an industry thought leader
  • Drive business growth

Expanding Your AI Marketing Toolkit

In addition to creating widgets, you can also use FeedWind to curate and share content related to AI tools in B2B marketing. This can be done by creating newsletters, social media posts, or blog articles that feature insights from industry experts, case studies of successful AI implementations, and comparisons of different AI tools.

Staying Ahead of the Curve with FeedWind

As AI continues to revolutionize the B2B marketing landscape, FeedWind provides a valuable resource for staying up-to-date on the latest tools and trends and effectively communicating their benefits to your target audience.

Empowering B2B Marketing Excellence

Embrace the power of AI tools with FeedWind as your guide and elevate your B2B marketing strategies to new heights of success.

Pinterest widget – Pin style

$
0
0
Pinterest widget pin style

Easy Steps

Widget Settings
  1. Create widget -> Pinterest
  2. Feed URL -> https://www.pinterest.com/feedwindwidgets/
  3. General -> Width -> Responsive/In Pixels -> Responsive
  4. General -> Style -> Pin
  5. General -> Width-> Posts -> 2
  6. General -> Height -> Posts -> 1
  7. General -> Scroll -> ON
  8. General -> Scroll -> Horizontal
  9. General -> Scroll -> Navigation arrow -> ON
  10. General -> Scroll -> Autoscroll -> ON
  11. General -> Scroll -> Autoscroll -> Normal
  12. General -> Scroll -> Scroll speed -> 4
  13. General -> Scroll -> Scroll Direction -> Left
  14. General -> Style -> Thumbnail resizing -> Crop image to fill thumbnail
  15. Feed Title -> Custom -> ON
  16. Feed Title -> Custom -> Main Title -> Pinterest Widget
  17. Feed Title -> Font size -> 20
  18. Feed Title -> Colors -> Background color -> #f30000
  19. Feed Title -> Colors -> Font color -> #FFFFFF
  20. Feed Content -> Display Content -> Content
  21. Feed Content -> Size -> Item title -> 16
  22. Feed Content -> Size -> Bold -> OFF
  23. Feed Content -> Size -> Content -> 12
  24. Feed Content -> Colors -> Title font -> #2e7ec8
  25. Feed Content -> Colors -> Content font -> #505659
  26. Feed Content -> Colors -> Background -> #ffffff
  27. Rest keep as default

FeedWind: A Simple and Easy Alternative to Elfsight

$
0
0

FeedWind and Elfsight are both popular tools for embedding social media feeds on websites. While Elfsight is a well-known name in the market, FeedWind has been gaining popularity as a reliable and affordable alternative. Both offer a variety of widgets to enhance your website. However, this guide will focus on why FeedWind might be a superior alternative to Elfsight.

Understanding FeedWind

FeedWind bests alternative to Elfsight

FeedWind is a powerful RSS feed widget that not only allows you to display content from various sources on your website but also to connect and integrate with your social media accounts. With its customizable options and user-friendly interface, you can easily create and embed custom feeds to match your site’s design, while also showcasing your latest social media updates and posts. 

Whether you’re looking to display news, blog posts, or social media content, FeedWind is the perfect Elfsight alternative solution for seamlessly incorporating diverse content into your website.

Advantages of FeedWind Over Elfsight

Advantages-of-FeedWind-Over-Elfsight

Both FeedWind and Elfsight offer a range of widgets and plugins to cover various website functionalities, from forms and pop-ups to social media integration and e-commerce support. However, FeedWind offers more customization options, allowing businesses to tailor widgets to match their brand identity and website design seamlessly. 

Additionally, FeedWind’s widgets are optimized for performance, ensuring that they do not slow down website loading times, which can negatively impact user experience and SEO rankings. Even if you’re not tech-savvy, you can easily create and customize widgets.

Customization

FeedWind offers a wide range of customization options that allow you to tailor your widgets to match your website’s design and branding. Some of the customization options include:

  • The ability to choose the layout and design of your widgets, including color, font size, and positioning
  • Customizable content filters, allow you to display only the most relevant and engaging content
  • The ability to integrate with a variety of social media platforms, such as Twitter, Instagram, and Facebook
  • Customizable feed templates, allow you to create widgets that are specific to your industry or niche
  • Integration with popular website platforms, such as WordPress, Squarespace, and Shopify
Customization

Unlimited Page Views

Unlimited widget views

In contrast to Elfsight, which places a limit on page views, FeedWind provides you with the freedom to display your social media feeds to an unlimited number of visitors. This means that you can reach a wider audience and increase the visibility of your website and social media accounts without incurring any extra costs. 

Whether you’re a small business owner or a blogger, FeedWind’s unlimited page view feature can help you reach a larger audience, without any additional expense or effort.

Pricing

When it comes to pricing, FeedWind has a distinct advantage over Elfsight. While Elfsight offers tiered pricing plans based on the number of page views, FeedWind’s pricing is much more straightforward. With FeedWind, you pay a flat fee for unlimited page views, regardless of the size of your website or audience.

This can be especially advantageous for small businesses or individuals on a tight budget, as it allows you to keep costs predictable while still benefiting from all of FeedWind’s features like multiple widgets and customization capabilities. 

Additionally, FeedWind’s pricing structure offers greater flexibility for future growth, as you won’t need to worry about upgrading your plan as your website or audience grows.

Support

FeedWind has a reputation for excellent customer support. They offer a comprehensive knowledge base and responsive email support to help you resolve any issues quickly.

Conclusion

Feedwind is a better alternative to Elfsight. It is more affordable, easy to use, and offers a good range of customization options and widgets. If you are looking for a widget and plugin provider for your website, we recommend trying Feedwind its affordability, ease of use, fully customizable, great customer support & wide range of widgets.

No more waiting, create captivating widgets and engage your users now!

FeedWind: EmbedSocial Alternative for Customizable Social Media Feeds

$
0
0

Why FeedWind is an EmbedSocial alternative. FeedWind is a helpful tool for putting social media feeds on websites and blogs. It’s a great option instead of using EmbedSocial or similar tools. Unlike EmbedSocial, FeedWind is easier to use because it has a simple setup and quick customer support. It also gives you a chance to try it for free before deciding if you want to use it more.

EmbedSocial alternative for social-media-collage

EmbedSocial is another tool that does the same thing – it helps you put social media feeds on your website.

Even though there are other options, FeedWind is a great choice if you want to add social media to your website easily.

In short, FeedWind is a top choice, and that is why it’s a great EmbedSocial alternative. It has lots of useful features and is easy to use for adding social media to websites and blogs. The customizable widgets, analytics, and quick customer service make FeedWind a strong option in the world of social media tools.

FeedWind outshines EmbedSocial

In various ways, FeedWind makes it a superior choice. Here’s why:

FeedWind outshines EmbedSocial
  1. Customization Options: FeedWind provides a high level of customization elements such as colors, fonts, backgrounds, and dimensions to create a cohesive and visually appealing look.
  2. Content Diversity: FeedWind lets you create diverse social media feeds with multiple content types, keeping your website engaging for visitors. Additionally, FeedWind provides the flexibility to use multiple content sources for your widgets, giving you greater control over the content you display.
  3. User-Friendly Interface: FeedWind’s user-friendly interface and settings screen make it easy to integrate and customize your social media feeds, while the responsive customer support ensures that you get timely assistance when needed.

FeedWind’s customization, content diversification, analytics, and ease of use make it a powerful alternative to EmbedSocial.

Comparison of Customization Options

FeedWind and EmbedSocial offer customization options for social media feeds, but FeedWind’s options are more comprehensive and flexible. Here are a few key differences:

Comparison of Customization Options
  1. Platform Compatibility: FeedWind supports a wide range of social media platforms, including Twitter, Instagram, Pinterest, Facebook, and YouTube, giving you more options for integrating social media content into your website.
  2. CSS Customization: For advanced users, FeedWind allows for customization of the feed’s style using CSS, enabling precise control over the feed’s appearance to match your website’s branding.
  3. Responsive Design: FeedWind’s widgets adapt to any screen size or device, ensuring an optimal viewing experience for your visitors on all platforms.
  4. Multiple Widget Types: FeedWind provides a range of widget types, allowing you to display different types of content, such as social media posts, images, and videos, in various formats to keep your website engaging and diverse.

Conclusion

Compared to EmbedSocial, FeedWind provides a more comprehensive set of features and customization options. The EmbedReviews plan from EmbedSocial, although providing unlimited widgets and feeds, restricts users to a single widget or content source, limiting customization options for users. FeedWind, on the other hand, supports a wider range of social media platforms, offers greater customization options through CSS, provides multiple widget types for displaying diverse content, and ensures a responsive design for optimal viewing on all devices. These features make FeedWind a more flexible and adaptable option for those looking to integrate social media feeds into their website in a customized and effective manner.

Enhancing User Engagement with YouTube Widgets on Your Website

$
0
0

A YouTube widget lets you seamlessly integrate video content from YouTube into your website. This tool is essential for adding dynamic and interactive elements to your site, whether it’s showcasing your latest video uploads or a carefully selected playlist that resonates with your audience’s interests.

youtube-widget-for-your-website

The Purpose of YouTube Widgets

 Purpose of YouTube Widgets

YouTube widgets serve to enrich your website’s multimedia experience. They allow you to embed videos directly into your web pages, offering tutorials, product demos, customer testimonials, or any content that enhances visitor engagement without navigating away from your site.

Advantages of Embedding YouTube Widgets

  1. Boost User Engagement: Videos engage users like no other medium. By embedding YouTube widgets, you extend the time visitors spend interacting with your content, signaling to search engines the value and relevance of your site, which can improve your SEO rankings.
  2. Enrich Content Experience: YouTube widgets diversify your content, breaking the monotony of text and static images with engaging videos that can entertainingly explain complex topics.
  3. Ease of Access: Embedding videos directly on your site makes them more accessible, providing a smoother user experience by keeping visitors on your site while they consume video content.
  4. Build Trust with Social Proof: Videos, especially testimonials and product walkthroughs, act as social proof that builds trust with potential customers, crucial for businesses aiming to establish credibility.
  5. Seamless Integration: YouTube widgets allow for the integration of video content that complements your site’s design, maintaining aesthetic appeal while adding value.

Benefits of Elevated Engagement

Embedding YouTube widgets can transform your website by:

  • Enhancing SEO: Engaging videos with lower bounce rates and increasing time on site, are both key factors in improving your search rankings.
  • Increasing Conversions: Engaged visitors are more likely to convert, making video content a powerful tool in guiding users through the sales funnel.
  • Boosting Brand Recall: Memorable video content can significantly improve brand recall, making your brand more recognizable and favored among your audience.
  • Expanding Reach through Shares: Videos that resonate with viewers are more likely to be shared, increasing your content’s reach and potentially driving more traffic to your site.
Display trending youtube videos

Implementing YouTube Widgets

Even those not technically savvy can enhance their website with YouTube widgets by following straightforward guides like “Steps To Create YouTube Widget | FeedWind.” These guides typically involve:

  • Selecting the YouTube content you want to feature.
  • Customizing the widget to fit your site’s look and feel.
  • Copying and pasting the generated code into your website’s HTML.

Incorporating a YouTube widget is a strategic move to make your website more interactive, engaging, and valuable to your visitors, leveraging video content to achieve your digital marketing goals effectively.


Ultimate Bento Design in FeedWind Widgets

$
0
0

Bento Design: Transform Your Digital Space with FeedWind
Welcome, digital enthusiasts and content crafters! Are you eager to revolutionize your digital space and transform it from a chaotic mess into a sleek, well-curated gallery? Look no further than the Bento Design, a dynamic and versatile solution that, when paired with FeedWind, promises to breathe new life into your content presentation. So, buckle up and join us as we embark on a journey to master the Bento Layout, adding a touch of magic to your digital world and crafting a captivating online experience!

Why Bento Design?

  • Visual Delight: Just like the artfully arranged Japanese bento box, the Bento Design layout provides a stunning and organized way to display diverse content in neat compartments, pleasing to the eye, and easy to navigate.
  • Boosted Engagement: This layout keeps users glued by offering an intuitive browsing experience, making it effortless for them to discover exactly what they’re looking for.
Bento design Style

Crafting Your Bento Design Style Widget with FeedWind: A Step-by-Step Guide

  • Get Started with FeedWind: Kick things off by signing up or logging into FeedWind. You’ll be welcomed by a dashboard as inviting as a cozy cafe on a bustling morning.
  • Select Your Content Source: Choose RSS feeds as your content source.
select-content-source
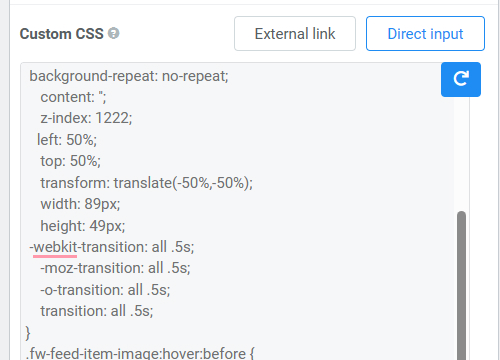
  • Customize Your Widget: Dive into the customization options and copy custom CSS from the following code snippet for the widget layout style. and paste it inside the direct input CSS option on the settings page.
  • Embed and Showcase: Copy that embed code and paste it into your site. Watch as your digital presence blooms!

Bento Design Style Widget Demo

Easy Steps

Widget Settings
  1. Create widget -> RSS
  2. Feed URL -> https://www.wired.com/feed/category/business/latest/rss
  3. General -> Width -> Responsive/In Pixels -> Responsive
  4. General -> Style -> Card
  5. General -> Height -> Posts -> 4
  6. General -> Scroll -> ON
  7. General -> Scroll -> Scroll Bar -> OFF
  8. General -> Scroll -> Autoscroll -> ON
  9. General -> Scroll -> Autoscroll -> Normal
  10. General -> Scroll -> Scroll Speed-> 4
  11. General -> Advanced Settings -> Custom CSS -> Direct Input ->Show custom css
    Note: Copy CSS from below, paste into your CSS file [your-file-name.css] , make changes as per your need and upload to your server or in Dropbox [ Check How to host CSS on Dropbox Click here], copy the complete CSS path [e.g. http//example.com/css/your-file.css] and paste in "Advanced -> Custom CSS -> Direct Input" field in FeedWind setting.
    
    
    /* Copy CSS from here  */
     /* Container for the grid */
     .slick-slide {
         margin: 2rem;
     }
    
     .fw-hs-slick-item {
         position: relative;
         /* Set position to relative to contain the absolute pseudo-element */
         /* ... other existing styles for fw-hs-slick-item ... */
     }
    
     /* Pseudo-element for the gradient overlay */
     .fw-hs-slick-item .fw-feed-item::after {
         content: '';
         /* Required for pseudo-elements */
         position: absolute;
         /* Position it over the fw-hs-slick-item */
         top: 0;
         /* Align to the top of the fw-hs-slick-item */
         left: 0;
         /* Align to the left of the fw-hs-slick-item */
         right: 0;
         /* Align to the right of the fw-hs-slick-item */
         bottom: 0;
         /* Align to the bottom of the fw-hs-slick-item */
         background: linear-gradient(to bottom,
                 rgba(0, 0, 0, 1) 0%,
                 rgba(0, 0, 0, 0.2) 50%,
                 rgba(0, 0, 0, 0.6) 100%);
         /* Gradient from dark at the top and bottom to transparent in the middle */
         z-index: 3;
         /* Place it above the item content but below any text or interactive elements */
     }
    
     /* Ensure that any content inside the fw-hs-slick-item is placed above the overlay */
     .fw-hs-slick-item>* {
         position: relative;
         z-index: 2;
         /* Higher z-index to ensure visibility above the overlay */
     }
    
     .fw-hs-slick-item {
         display: grid !important;
         grid-template-columns: repeat(4, 1fr);
         /* 4 columns */
         grid-template-rows: auto;
         /* Rows sized based on content */
         grid-gap: 10px;
         /* Gap between items */
         max-width: 1400px;
         /* Adjust the width as needed */
         margin: auto;
         /* Center the grid on the page */
     }
    
     /* General style for grid items */
     .fw-hs-slick-item .fw-feed-item {
         background-color: #444;
         /* Default background color */
         color: white;
         /* Default text color */
         border-radius: 20px;
         /* Border radius */
         padding: 0px;
         /* Padding */
         height: 200px;
         /* Set a fixed height for the items */
         overflow: hidden;
         position: relative;
     }
    
     /* Style for the large item, which is the first child */
     .fw-hs-slick-item .fw-feed-item:nth-child(4n+1) {
         grid-column: span 2;
         /* Span 2 columns */
         grid-row: span 2;
         /* Span 2 rows */
         background-color: #4CAF50;
         /* Green background color */
         height: auto;
         /* Adjust height to account for grid gap */
     }
    
     /* Style for the second item */
     .fw-hs-slick-item .fw-feed-item:nth-child(4n+2) {
         background-color: #2196F3;
         /* Blue background color */
         grid-column: span 2;
     }
    
     .fw-hs-slick-item .fw-feed-item:nth-child(4n+2) .fw-feed-item-title {
         font-size: 18px !Important;
     }
    
     /* Style for the third item */
     .fw-hs-slick-item .fw-feed-item:nth-child(4n+3),
     .fw-hs-slick-item .fw-feed-item:nth-child(4n+4) {
         grid-column: span 1;
         /* Span 1 column */
         grid-row: span 1;
         /* Span 1 row */
         background-color: #f44336;
         /* Red background color */
     }
    
     .fw-hs-slick-item .fw-feed-item:nth-child(4n+3) .fw-feed-item-title,
     .fw-hs-slick-item .fw-feed-item:nth-child(4n+4) .fw-feed-item-title {
         font-size: 14px !Important;
     }
    
     /* Style for the fourth item */
     .fw-hs-slick-item .fw-feed-item:nth-child(4n+4) {
         background-color: #ffeb3b;
         /* Yellow background color */
     }
    
     .fw-hs-slick-item .fw-feed-item .fw-feed-item-image {
         position: absolute;
         top: 0;
         left: 0;
         width: 100%;
         height: 100%;
         object-fit: cover;
         /* Cover the area of the parent div without losing aspect ratio */
         z-index: 1;
         /* Place the image below the text content */
     }
    
     #fw-feed-items .fw-feed-item-url[onclick] {
         height: 100%;
     }
    
     .fw-feed-item-content-module {
         height: 100%;
         z-index: 4;
         position: relative;
         padding: 1rem;
     }
    
     span.fw-feed-item-date {
         position: absolute;
         bottom: 4rem;
         right: 1rem;
     }
    
     span.fw-feed-item-link {
         position: absolute;
         top: 1rem;
         text-transform: uppercase;
     }
    
     .fw-feed-item-title {
         position: relative;
         top: 2rem;
     }
    
     /* Add responsive design rules as needed  */
      @media (max-width: 600px) {
        .fw-hs-slick-item {
          grid-template-columns: 1fr; /* 1 column on small screens */
     }
    
     .fw-hs-slick-item .fw-feed-item:nth-child(4n+1),
     .fw-hs-slick-item .fw-feed-item:nth-child(4n+2),
     .fw-hs-slick-item .fw-feed-item:nth-child(4n+3),
     .fw-hs-slick-item .fw-feed-item:nth-child(4n+4) {
         grid-column: span 1;
         grid-row: span 1;
         height: 200px;
         /* Reset to original height */
     }
     }


    /* CSS Ends Here  */
    
  12. Feed Title -> Custom -> OFF
  13. Feed Content -> Display Content -> Title
  14. Feed Content -> Size -> Item title -> 26
  15. Feed Content -> Colors -> Title font -> #ffffff
  16. Feed Content -> Colors -> Background -> transparent
  17. Feed Content -> Advanced Settings -> Time/Date -> ON
  18. Feed Content -> Advanced Settings -> Time/Date -> [10] [#ffffff]
  19. Rest keep as default

As we conclude, dear creators, we present to you a comprehensive guide to making a significant impact in the digital realm using the Bento Design (learn more) and FeedWind. By implementing these tools, you’ll not only enhance your digital space’s aesthetics but also forge a deeper connection with your audience, craft engaging narratives, and create a welcoming atmosphere. Dive in and watch your digital world transform from mundane to exceptional. Remember, in the vast sea of content, how you present your message is just as important as the message itself. Let’s commit to curating with creativity and flair!

This guide is not only informative but also entertaining, skillfully combining professional expertise with a dash of personal charm, guaranteeing that your audience will leave both enlightened and entertained.

How to Add Cool YouTube Videos to Your Website Easily

$
0
0

Want to make your website more fun and engaging by showing some cool YouTube videos right on your pages? You’re in the right place! We’ll guide you through a super easy way to do this using a tool called FeedWind, step by step. You don’t need to be a tech whiz to follow along!

embed youtube videos on your website

Picking the Perfect Videos

First things first, let’s find the right videos to show on your site:

  1. Choose what fits: Pick YouTube videos that your visitors will love and that match what your website talks about.
  2. Go for quality: Clear, professional-looking videos make your site look good.
  3. Engaging content: Videos many people like and comment on are usually more interesting to watch.

Setting Up FeedWind

FeedWind is like a magic box that lets you show YouTube videos on your site. Here’s how to get started:

1. Sign up for FeedWind and log in.

2. Click ‘Create Widget’ and choose YouTube.

content source YouTube

3. Copy and paste the YouTube channel or playlist you want to use.

YouTube input field

4. Make it your own: Decide how many videos there are and how to display them using a custom design layout and other details.

Display layout setting

Making Videos Work Well on Your Site

We want the videos to load fast and look great:

  1. Just the right size: Not too big or too small, so they load quickly and still look good.
  2. Let viewers choose: It’s usually better if videos don’t start playing by themselves.
  3. Easy controls: Make sure people can play, pause, and control the video easily.
Making Videos Work Well on Your Site

Dressing Up Your Video Box

Make the video box look like it belongs on your site:

1.Change colors and sizes to match your website’s style.

FeedWind vs EmbedSocial - comparison

2. Play around with FeedWind’s settings until it looks just right.

Customization

Helping Your Page Load Fast

Nobody likes slow websites. Here’s a trick to keep your pages zippy:

lazy load

Use a lazy load trick. This means videos only load when someone scrolls down to them, not all at once.

Where to Put Your Videos

Think about where the videos will make the most impact:

1.In blog posts to break up the text and add something interesting.

Videos in blog posts

2. Near the top of the page, so people see them right away.

Videos on website header

3. Next to related text for how-tos or product info, so people can watch as they read.

Videos on product page
responsive videos

Making Sure Videos Look Good Everywhere

Videos should look great on phones, tablets, and computers:

  • Test your videos on different devices to make sure they adjust and look nice everywhere.

Keeping Track of What’s Working

See how much your visitors like the videos:

  • Use tools like Google Analytics to see which videos people watch the most and how long they stay.
video analytics

Adding YouTube videos to your website can make it more interesting and fun for your visitors. With these simple steps, you can do it all by yourself, even if you’re not a tech expert. Pick great videos, make them look nice on your site, and make sure everything loads fast and looks good on any device. If you ever get stuck or have questions, just ask for help!

How to Create a Vimeo Video Widget for Your Website – Easy Guide

$
0
0

Creating a Vimeo video gallery widget & display on your website is easy, even if you’re not very tech-savvy! Here’s a simple guide to help you put Vimeo videos on your website using a tool called FeedWind. This lets your site show the newest videos automatically.

Step 1: Get the Vimeo Video Feed

First, you need the special web address (URL) that tells FeedWind where to find the videos:

  1. Visit the Vimeo Channel: Go to the Vimeo page with the videos you want to show. For example, We will use a design channel, & the address might look like this: https://vimeo.com/channels/lowcydizajnu/.
    Vimeo design channel
  2. Make a Feed URL: Add /videos/rss/ to the end of the Vimeo page address. Now, it should look like this: https://vimeo.com/channels/lowcydizajnu/videos/rss/.
    Or you can copy the video RSS feed URL from the channel page directly please check the following image for reference.
    Vimeo rss feed
  3. Check the Feed: Open this new address in your web browser to ensure it shows a list of videos. It might look weird, but it’s working as long as there’s stuff there!vimeo-rss-feed-xml

Step 2: Create a FeedWind Account

You need an account with FeedWind to make this work:

  1. Sign Up or Log In: Head to the FeedWind website (https://feedwind.com/) and either sign up for a new account or log in if you already have one.Sign-up & Login
  2. Start a New Widget: On your account dashboard, click on “Create Widget.”create widget button

Step 3: Make Your Vimeo Video Widget

Here’s how you set up the video display:

  1. Choose Widget Type: Pick “RSS Feed” since you want to show videos using RSS feeds.content-source-selection
  2. Enter Your Feed URL: Put the feed URL you made into the right spot.feed_url_entry
  3. Thumbnail selection: Select by <media_thumbnail>selection-media-thumbnail
  4. Style: Select Card stylecard-view-01
  5. Style Your Widget: Choose how big it should be, what colors to use, and what details to show, like video titles or pictures.FeedWind vs EmbedSocial - comparison
  6. Add Play button: Copy and paste custom css in the direct Input field
    CSS Code..fw-feed-item-image { position: relative; } .fw-feed-item-image:before { background: url(https://dl.dropbox.com/scl/fi/238ai1ehvbwd78r9ihj2s/vimeo-play-btn.png?rlkey=xr63j1xtz1mcw77jng86reilb&dl=0); position: absolute; background-repeat: no-repeat; content: ''; z-index: 1222; left: 50%; top: 50%; transform: translate(-50%, -50%); width: 89px; height: 49px; -webkit-transition: all .5s; -moz-transition: all .5s; -o-transition: all .5s; transition: all .5s; } .fw-feed-item-image:hover:before { -ms-transform: scale(1.2); -moz-transform: scale(1.2); -webkit-transform: scale(1.2); -o-transform: scale(1.2); transform: translate(-50%, -50%) scale(1.2); }direct-input-field css
  7. Preview: You can look at a preview to see how it will look and make any necessary changes.

Step 4: Put the Widget on Your Website

  1. Get the Code: When happy with its appearance, click “Generate” to get the HTML code.example of copy widget code screen
  2. Add to Your Site: Copy this code and paste it into your website’s code where you want the videos to show up.

Step 5: Make Sure It Works

After you put the widget on your site:

  1. Test It Out: Visit your site to see if the videos appear right.
  2. Tweak If Needed: If it’s not looking or working right, you might need to adjust the settings back on FeedWind or double-check the feed URL.

And that’s it! Now your website will automatically display the latest videos from the Vimeo channel, keeping your visitors entertained and engaged with fresh content.


Latest Images